Renters and anyone without a spare wall should lean toward the freestanding builds, like the Freestanding Shelving Units with Closet Rods, since they need no stud or drill hole, while owners can commit to Black Track Wall Shelving and Walk-In Closet Built-Ins.
The list runs from the Stacked Wooden Crate System, which needs almost no tools, to the Room Divider Closet, which takes more lumber and finishing, and many of these builds come in under $200.
Whether you can fasten into the walls decides most of it.
1. Room Divider Closet
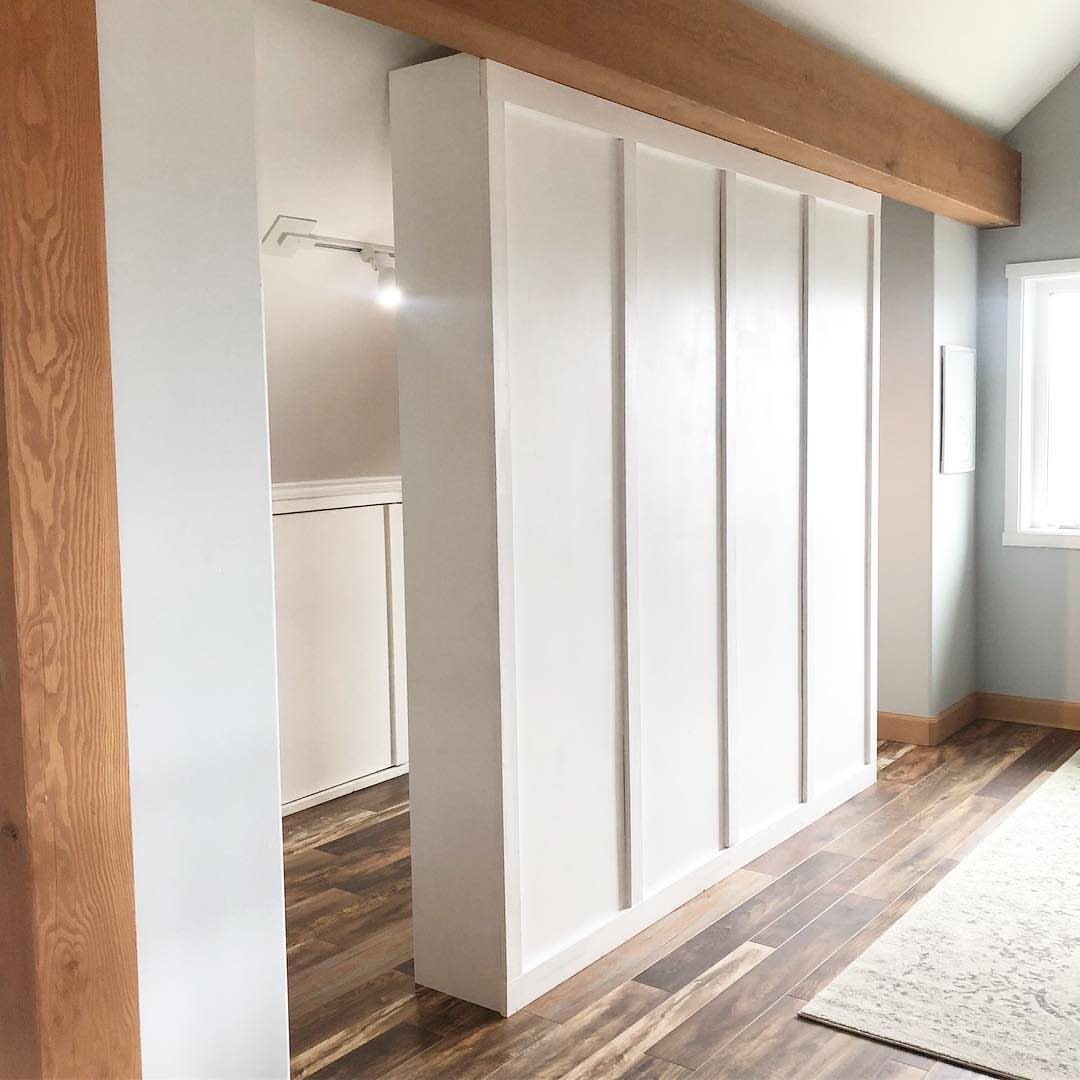
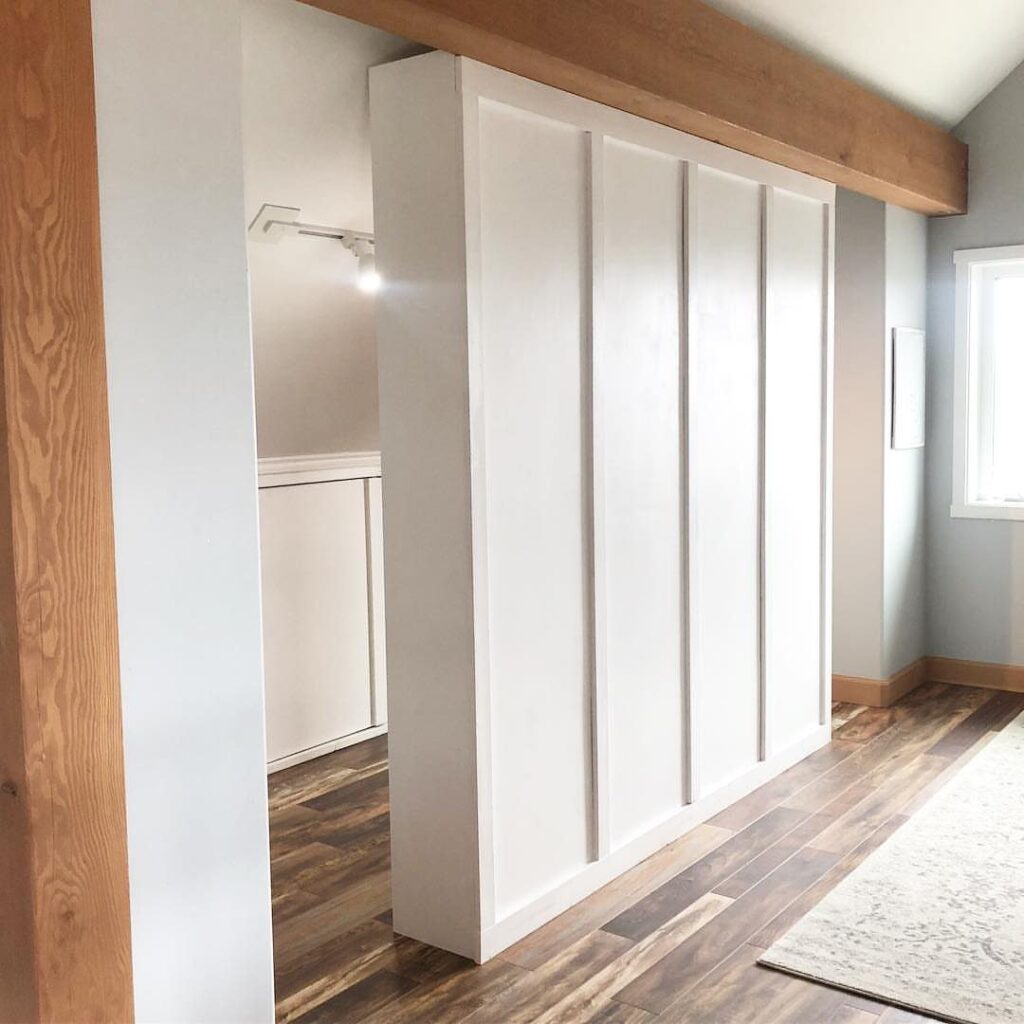
A closet built as a freestanding divider gives a room without a closet one, and it also marks off a sleeping or dressing zone.
Build the frame so the back side looks finished, since that face will be seen from the rest of the room.
White paint keeps a large piece like this from feeling heavy. With a ceiling beam overhead, I would keep the divider lower than the beam so the beam still reads as one continuous line.
A divider takes more lumber and more finishing than a wall-hung unit, so budget for that.
2. Shoe Shrine Organizer
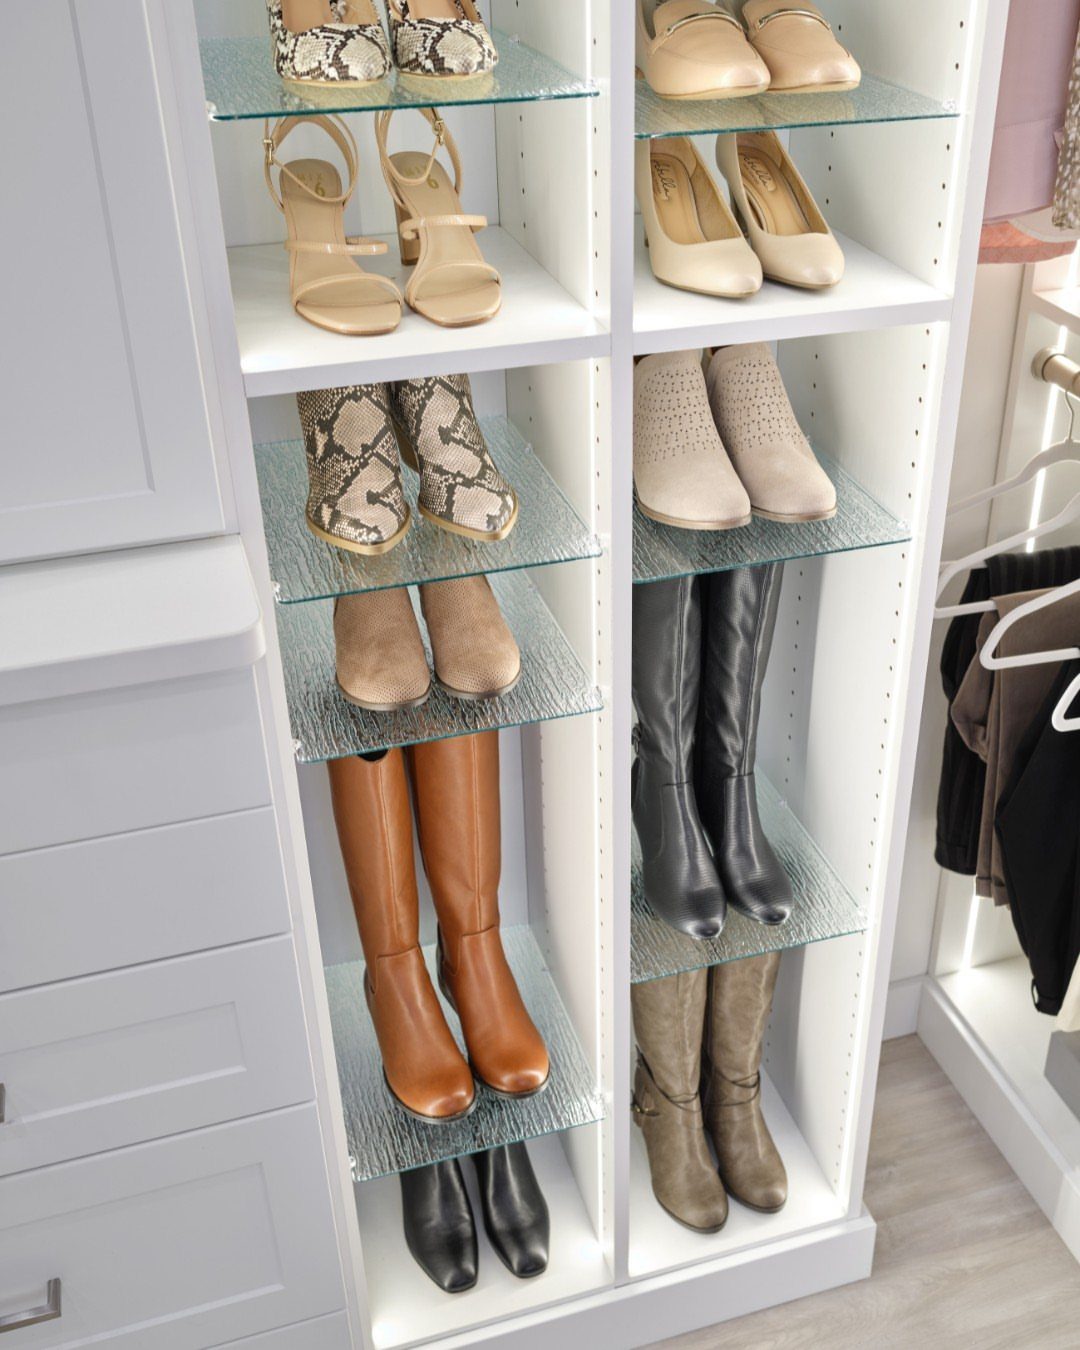
Glass shelves suit shoes because the pairs stay visible, and you can see every heel and boot shaft at a glance.
Fit each shelf height to what you actually own: tall boots need a tall bay, and flats can share a tight one.
I would measure the boots first and set the shelf spacing around them. Adjustable shelves cost a little more, but they let you change the layout when your shoe collection changes.
Glass shows dust, so plan on wiping it down now and then.
3. Customized Closet Shelving
Shelving built around what you own beats shelving built around a catalog. Start by sorting the clothes into hanging, folded and boxed piles, then size each section to its pile.
Black metal paired with wood is a good match for a mixed closet: rods for shirts and dresses, shelves for sweaters, and a dresser for the small items.
The dresser is the part I would add first, because it holds socks and underwear without needing extra shelves.
Leave a few open bays for whatever you buy next.
What had once looked like a cramped, overstuffed closet now feels closer to a boutique dressing room. The shelving added structure and made the entire space feel intentional.
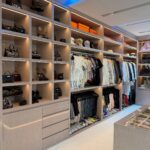
4. Walk-In Closet Built-Ins
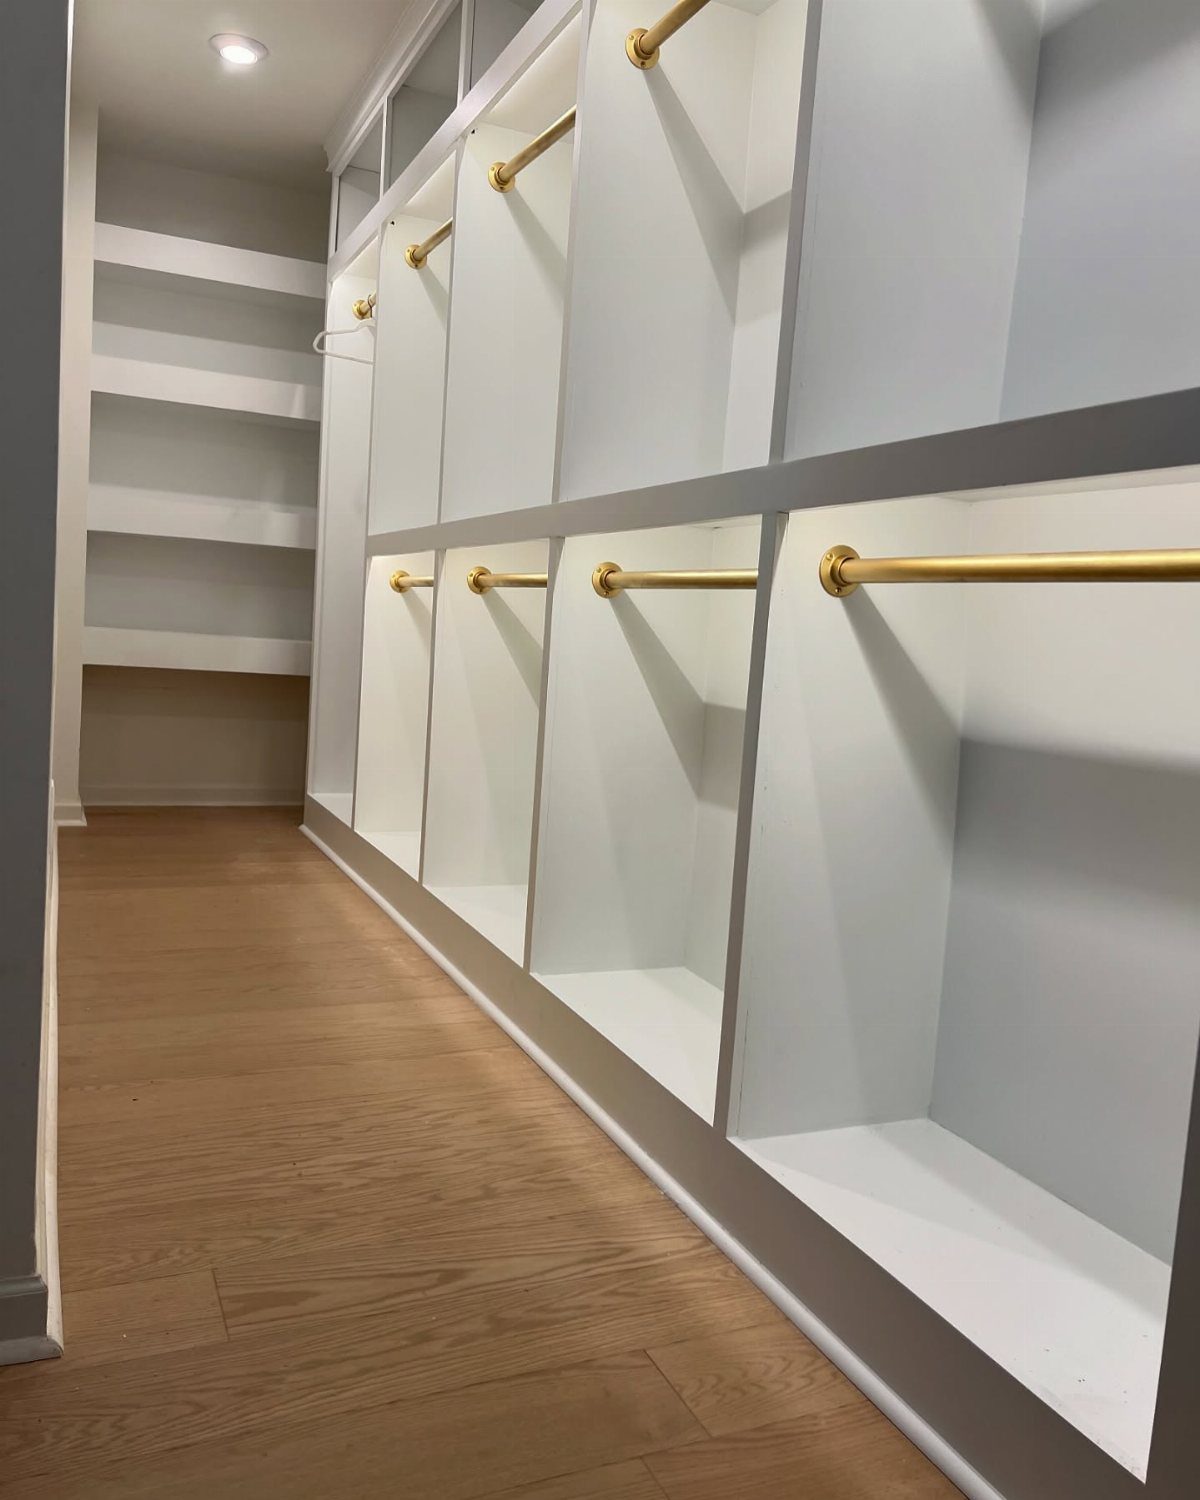
Built-ins make the most of a walk-in because they use the full wall height instead of stopping at one rod and a shelf.
Plan 2 rod levels where you can, with shelving above them for items you reach for less often.
Gold rods add a little warmth to white cabinetry, and they are an easy swap if you build the rest in plain white.
Draw the layout on paper first, with every wall measured, before buying a single board.
5. Open System with Built-In Drawers
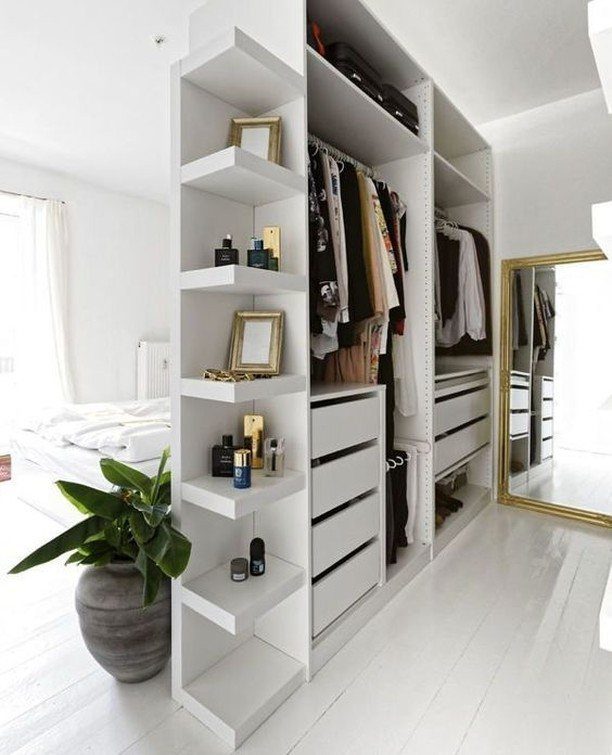
Drawers inside an open closet solve the one weakness of open storage: nowhere to hide small items. Rods and shelves hold what looks good on display, and the drawers keep the rest out of sight.
Against a bedroom wall, white is the right call.
I would put the drawers at the bottom, under the hanging rods, so the heaviest items sit low. Pull-out drawers need clearance in front, so leave room before placing the bed.
6. Industrial Wood and Metal System
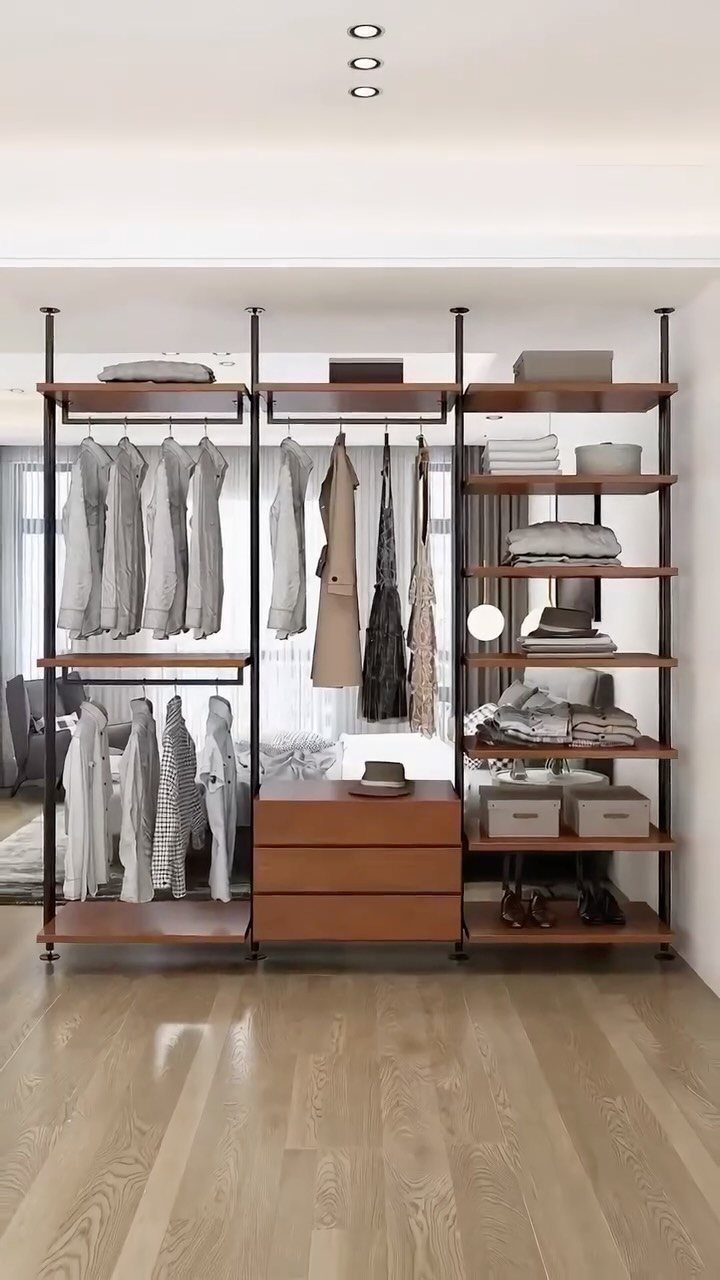
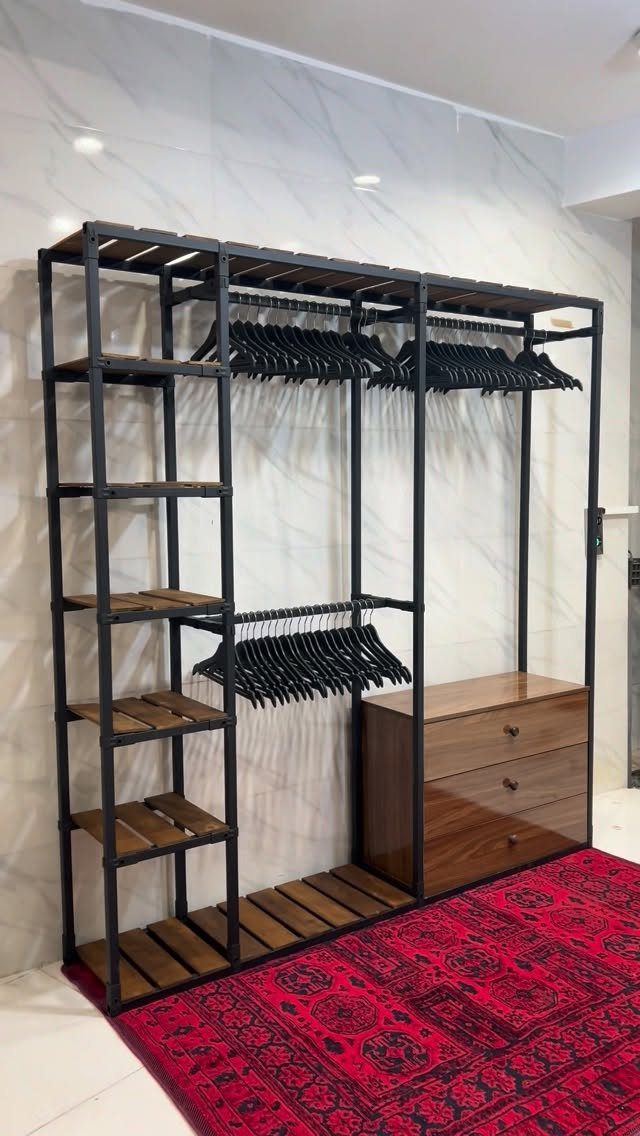
Dark metal poles with warm wood shelves make a closet that looks sturdy and a bit raw, and the modular design means you can build it in pieces.
Start with the poles and shelves, then add the bottom drawers when the budget allows.
Because the system is open, everything on the rods is visible, so I would hang clothes grouped by color. Put the drawers low for folded items.
The look suits a room with light wood floors, where the dark poles stand out.
7. Modular Cubby Closet with Rod
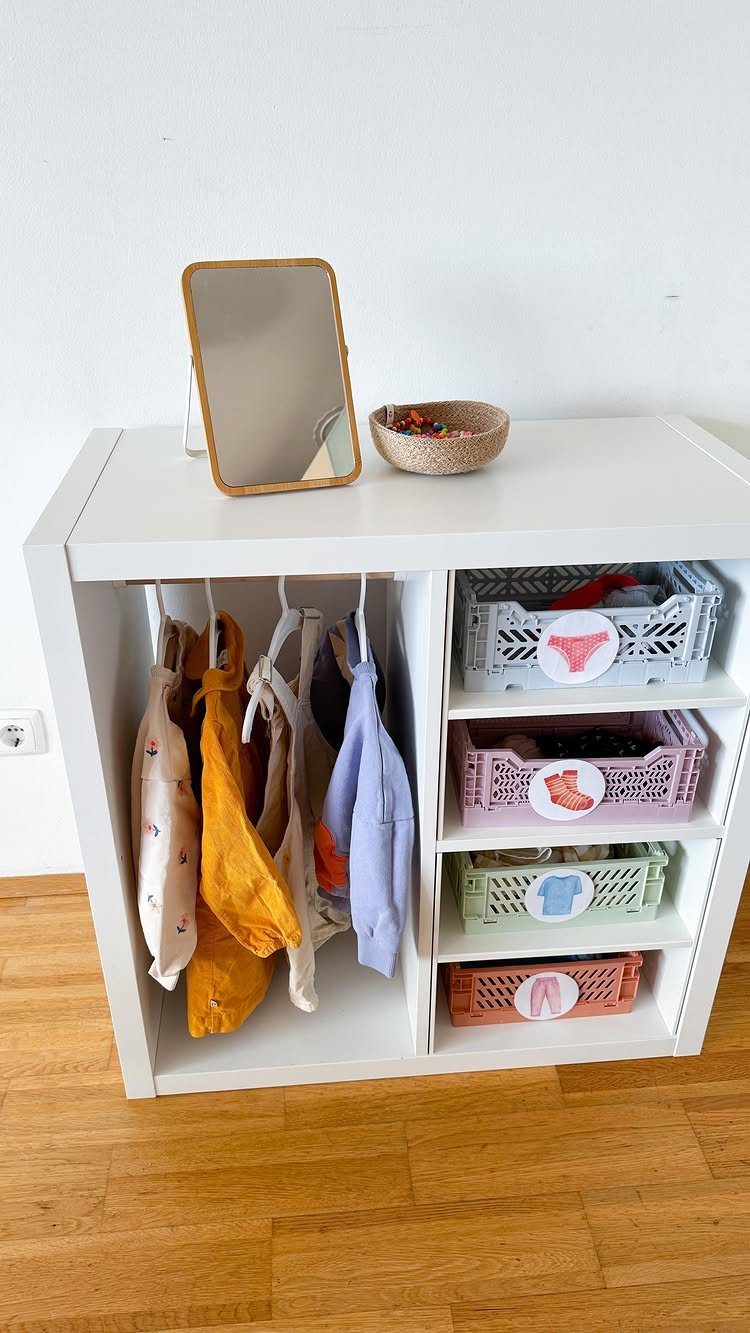
A cube organizer with a rod on one side turns into a small closet without any building. Bins take the folded pieces, and the rod holds whatever needs to hang.
Hang the rod on the side that suits the clothes you own, and match the bins to the categories. Icons or labels on the bins help kids and partners put things back in the right place.
A mirror on top uses the unit’s height, so a separate one isn’t needed.
8. Kid-Friendly Custom Built-Ins
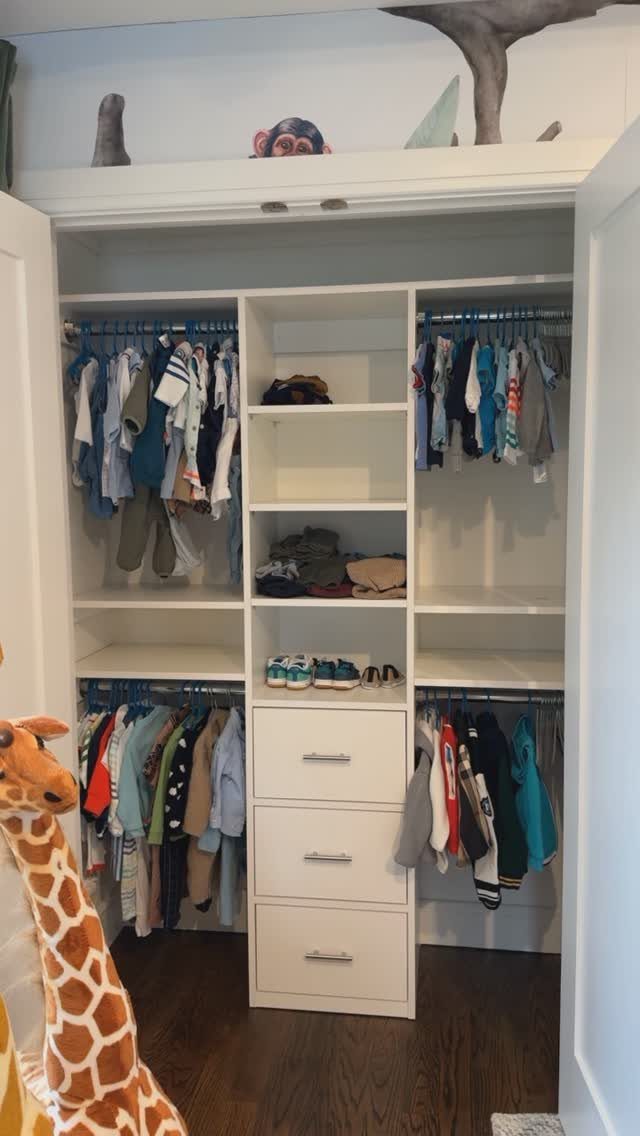
Low rods, open cubbies and drawers sized for small garments let a child dress without asking for help. Set the rod height to the child’s reach, not an adult’s.
I would keep the everyday outfits on the open shelves and the rod, and put the drawers at the bottom for items a child pulls out alone. Because kids grow, plan the shelf spacing so you can change it later.
White keeps a built-in like this from looking dated as the room changes.
9. Stacked Wooden Crate System
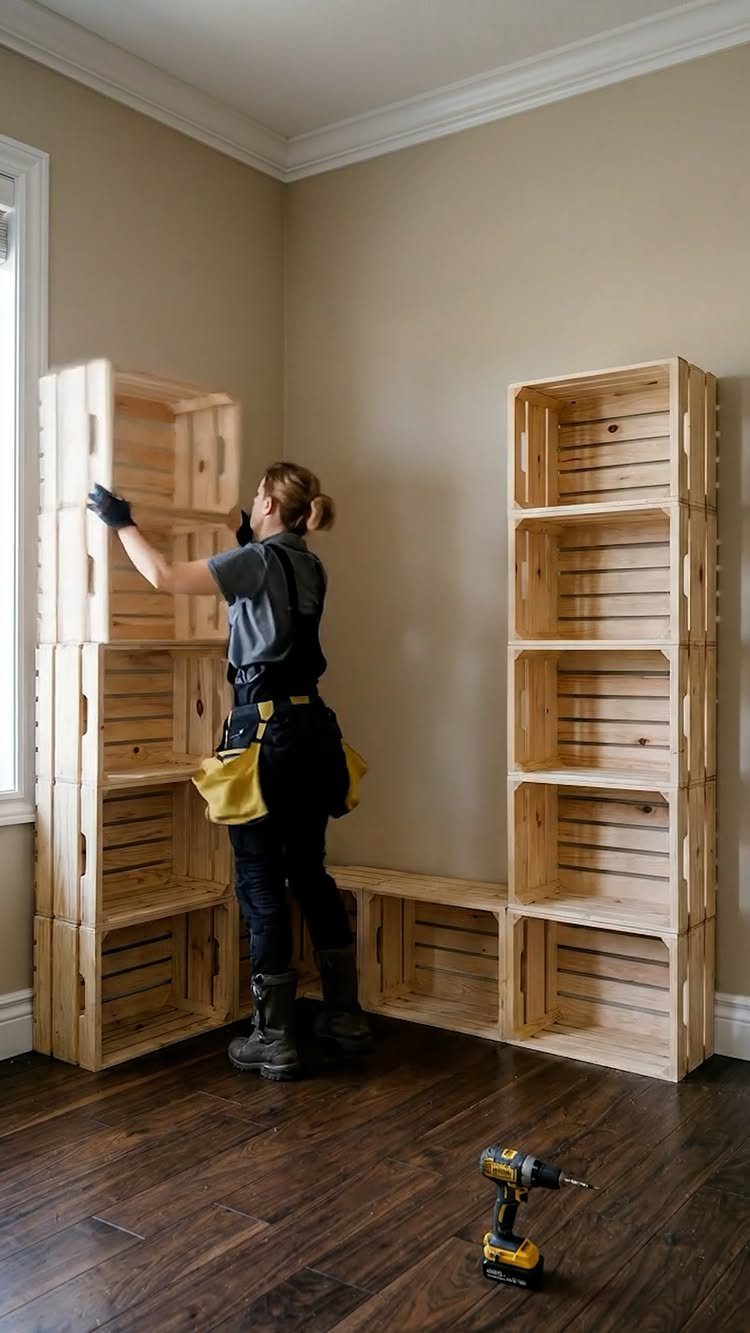
Unfinished wooden crates stacked against a wall make a closet organizer you can build with almost no tools. Each crate becomes a cubby, so you can arrange the stack to fit the wall.
Sand any rough edges before stacking, and a coat of clear sealer or paint is optional. If you want the stack to hold, screw the crates to each other with a drill, and to the wall if you can.
Crates suit folded clothes, shoes and bags better than hanging items; add a rod above them for those.
10. Black Track Wall Shelving
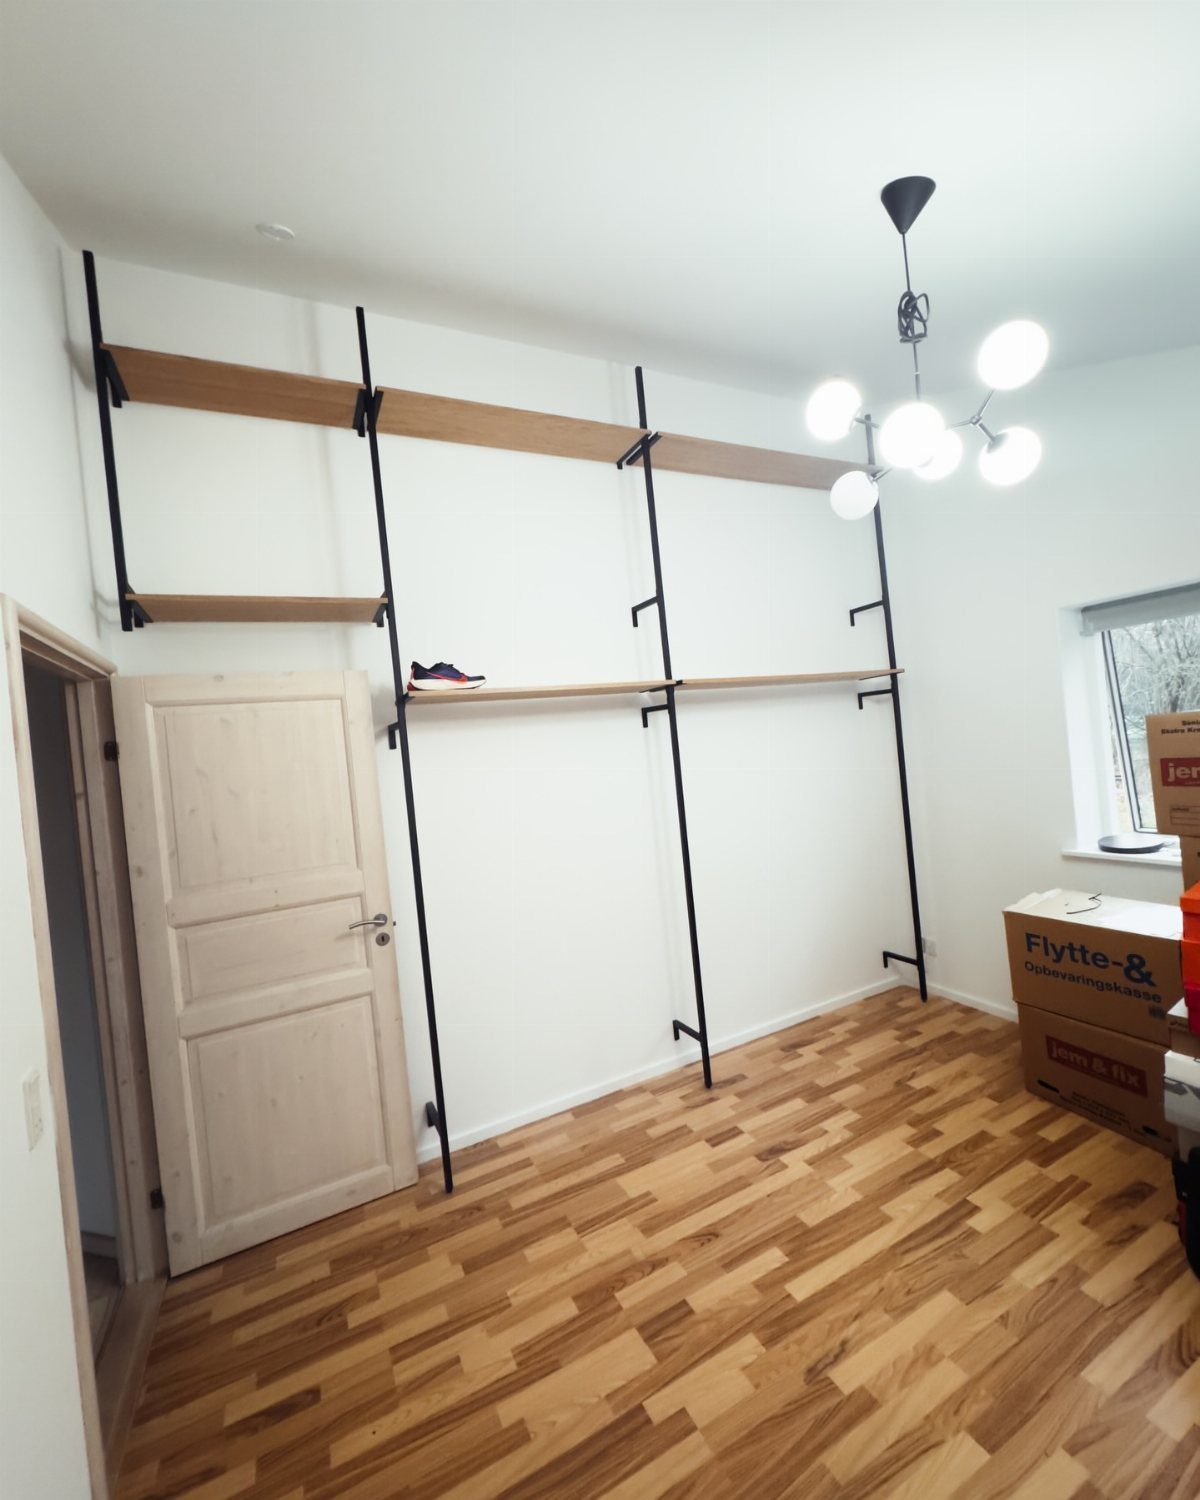
Track shelving puts two black metal standards on the wall and lets the shelves sit on brackets, so you can change the heights whenever your needs change. Light wood shelves against white walls look clean and a bit modern.
Find the studs and mount the rails into them, since the whole load rides on those screws. Level the rails carefully; a crooked rail tilts every shelf.
Start with fewer shelves than you think you need. Adding more later is simple, which is the main advantage over fixed shelving.
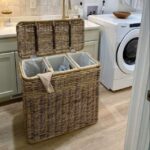
11. Laundry Basket Organizer
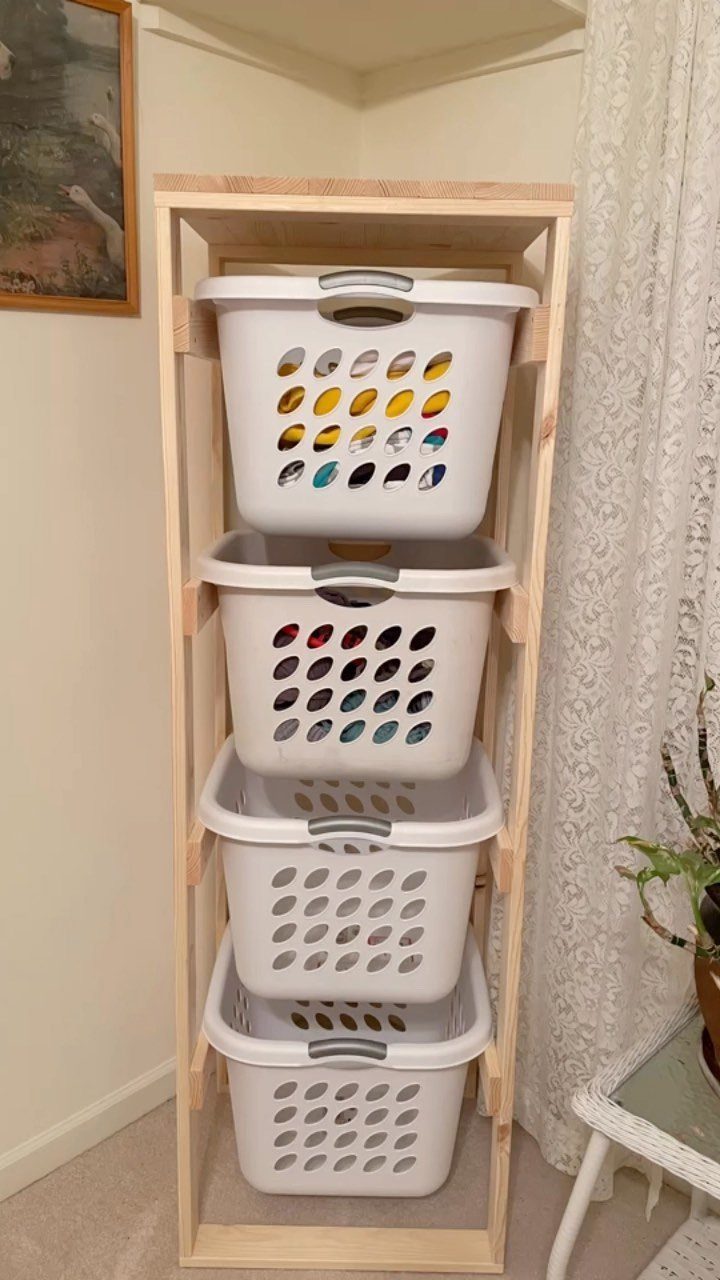
A wooden frame that holds laundry baskets works like a dresser for dirty clothes. Each basket slides out, so you can sort lights, darks and delicates before wash day.
You can build it inside a closet or make it stand alone. I would pick standalone if you rent, since it moves with you.
Size the frame to your basket dimensions before cutting lumber, and leave a little room around each basket so it slides easily.
12. Freestanding Shelving Units with Closet Rods
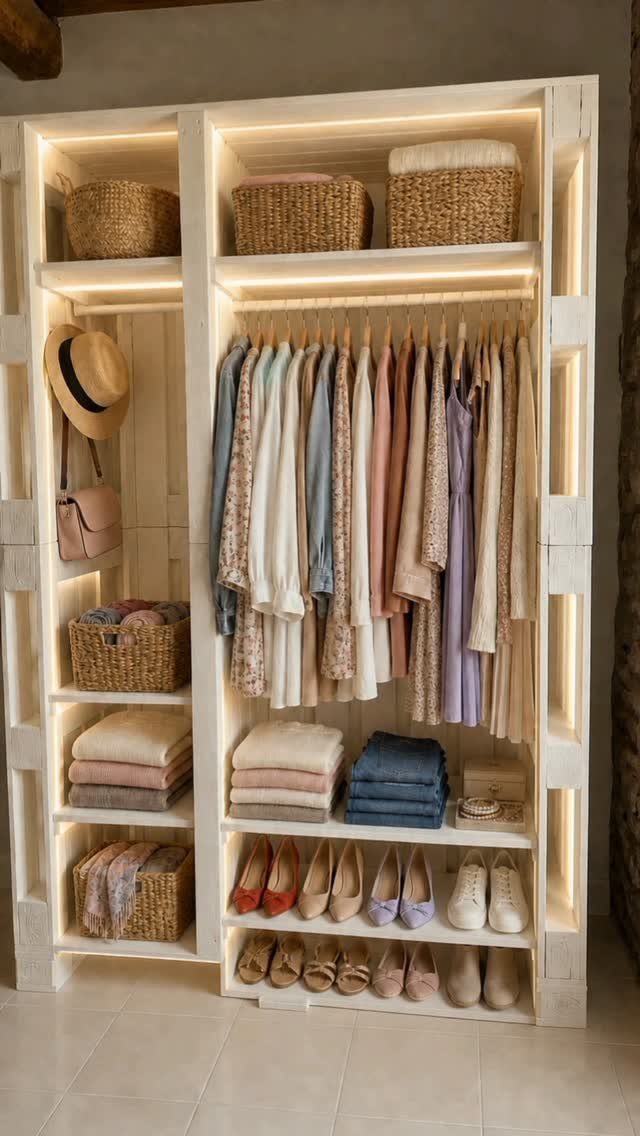
A freestanding shelving unit with a rod across it gives a bedroom with no closet a workable frame, and it goes up without a single stud or drill hole.
A hanging rod, shelves, baskets and a shoe row can all share one unit, and nothing needs to be fastened into the walls.
Integrated lighting makes a deep unit easier to use, so I would add LED strips if the budget allows.
Sort items by how often you use them, and put hanging pieces on the rod, folded items in baskets, and shoes low. Freestanding units are a good fit for renters, since they leave the walls alone.
Maximizing Space
Adjustable shelves and closet rods are what let a build keep working as your wardrobe changes. Set the shelf pins or brackets so you can raise or lower each shelf in minutes, and treat the rod height the same way.
Cube organizers add flexibility of their own. Fit some cubes with fabric bins that pull out like drawers, and leave others open for things you grab daily.
Baskets on a top shelf use height that usually goes to waste. Measure the shelf first so a set of rectangular baskets fits across with no gaps, and keep them light enough to lift down with one hand.
Installation Tips
Most of these builds need only a drill and a screwdriver. A tape measure, a level and a pencil belong on that list too, since a crooked rail or shelf shows up the moment you load it.
Read the assembly steps before opening a single box.
Some systems call for extra tools, such as a saw for trimming boards or a stud finder for wall mounting, and finding that out midway costs you a trip to the hardware store.
Drill pilot holes in wood to keep it from splitting. Work on the floor when you can, and lift the assembled unit into place only after checking it is square.
Budget Considerations
Many DIY closet systems come in under $200, and some hacks cost as little as $56.89. Buying ready-made furniture and adding a rod is the cheapest route.
Boxed closet systems cost more but come with matching brackets, extra top shelves and optional drawers, so you can add pieces over time.
Spread the spending over a few paychecks, and buy the rod and bins last, once you know what the shelves will hold.
Frequently Asked Questions
What materials do I need for a DIY closet system?
Most builds use MDF or plywood for the shelves and sides, plus closet rods and brackets or shelf pins.
Ready-made pieces like cube organizers, bookcases and wooden crates cut the lumber work, and you add a rod on top. Pre-drill every screw hole, and hold off on rods and storage bins until the frame tells you what fits.
How much does a custom closet system cost?
Many DIY closet systems come in under $200, and some hacks run as little as $56.89.
A bookcase with a hanging bar added costs less than any kit. Modular systems cost more up front, but the brackets and shelves match, and you can buy drawer inserts or upper tiers when the budget allows.
Can I install a closet system myself?
Yes, most of these builds need only a drill and a screwdriver. Bring a tape measure, level and pencil along with the drill, since even a half-degree tilt becomes obvious once clothes load the bar.
Check the instructions first, because a few designs need a saw for trimming or a stud finder for anchoring.