The ideas here run from a coat of paint on a plain bench to drawers, hooks, open shoe cubbies, a flip-top chest, a slat wall or a full L-shaped corner build, and the one that fits depends on what comes through your door every day.
Daily shoes, bags and hats belong in open cubbies or drawers you can reach in one motion, while off-season items can sit under a flip-top lid or behind the closed doors of a built-in cabinet.
1. Mudroom Bench with Drawers
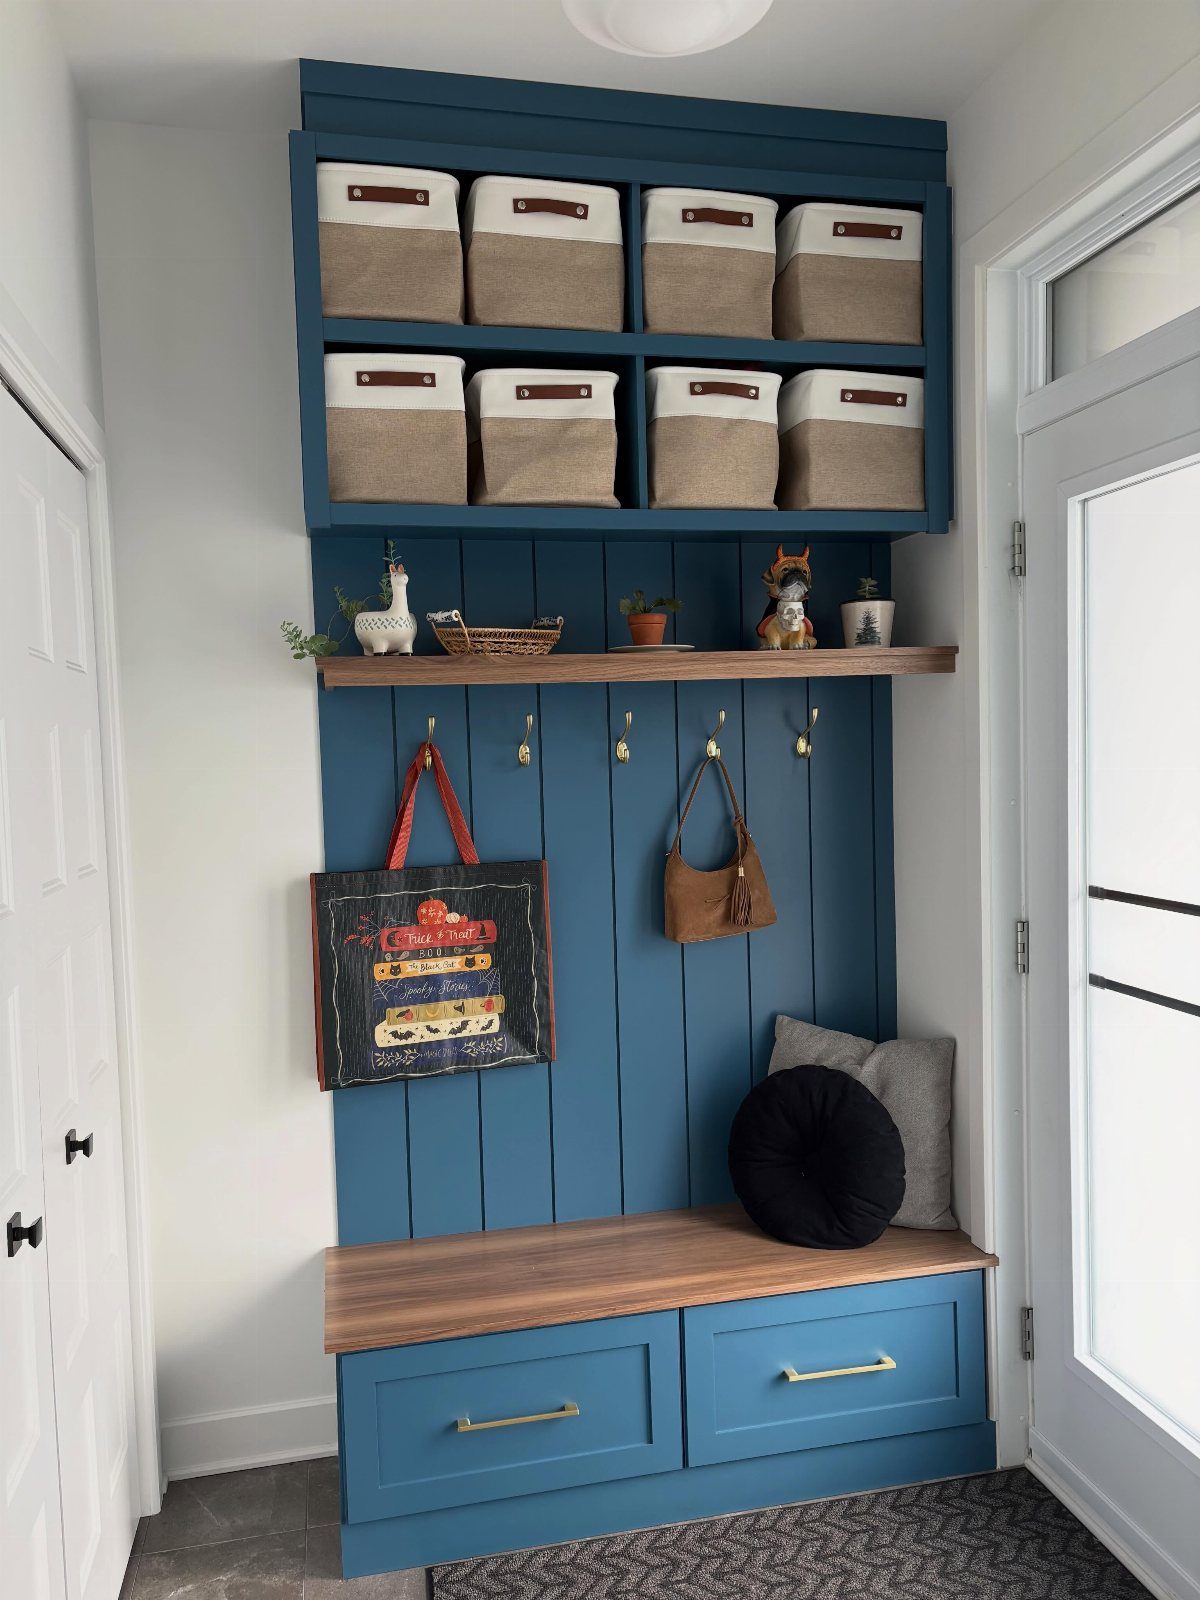
Drawers under the seat take the clutter that baskets only hide: gloves, dog leashes, sunscreen, spare chargers. Closed fronts keep the bench looking tidy even on a messy week.
Size the drawers to what you will actually put in them. Wide drawers hold bulky items better than narrow ones, and fewer drawer boxes means fewer parts to build and fewer slides to buy.
Pairing them with the open upper cubbies, as here, gives you a quick-grab zone and a hidden one.
I would put heavier, rarely used things in the drawers and daily items up top.
2. Painted Mudroom Bench
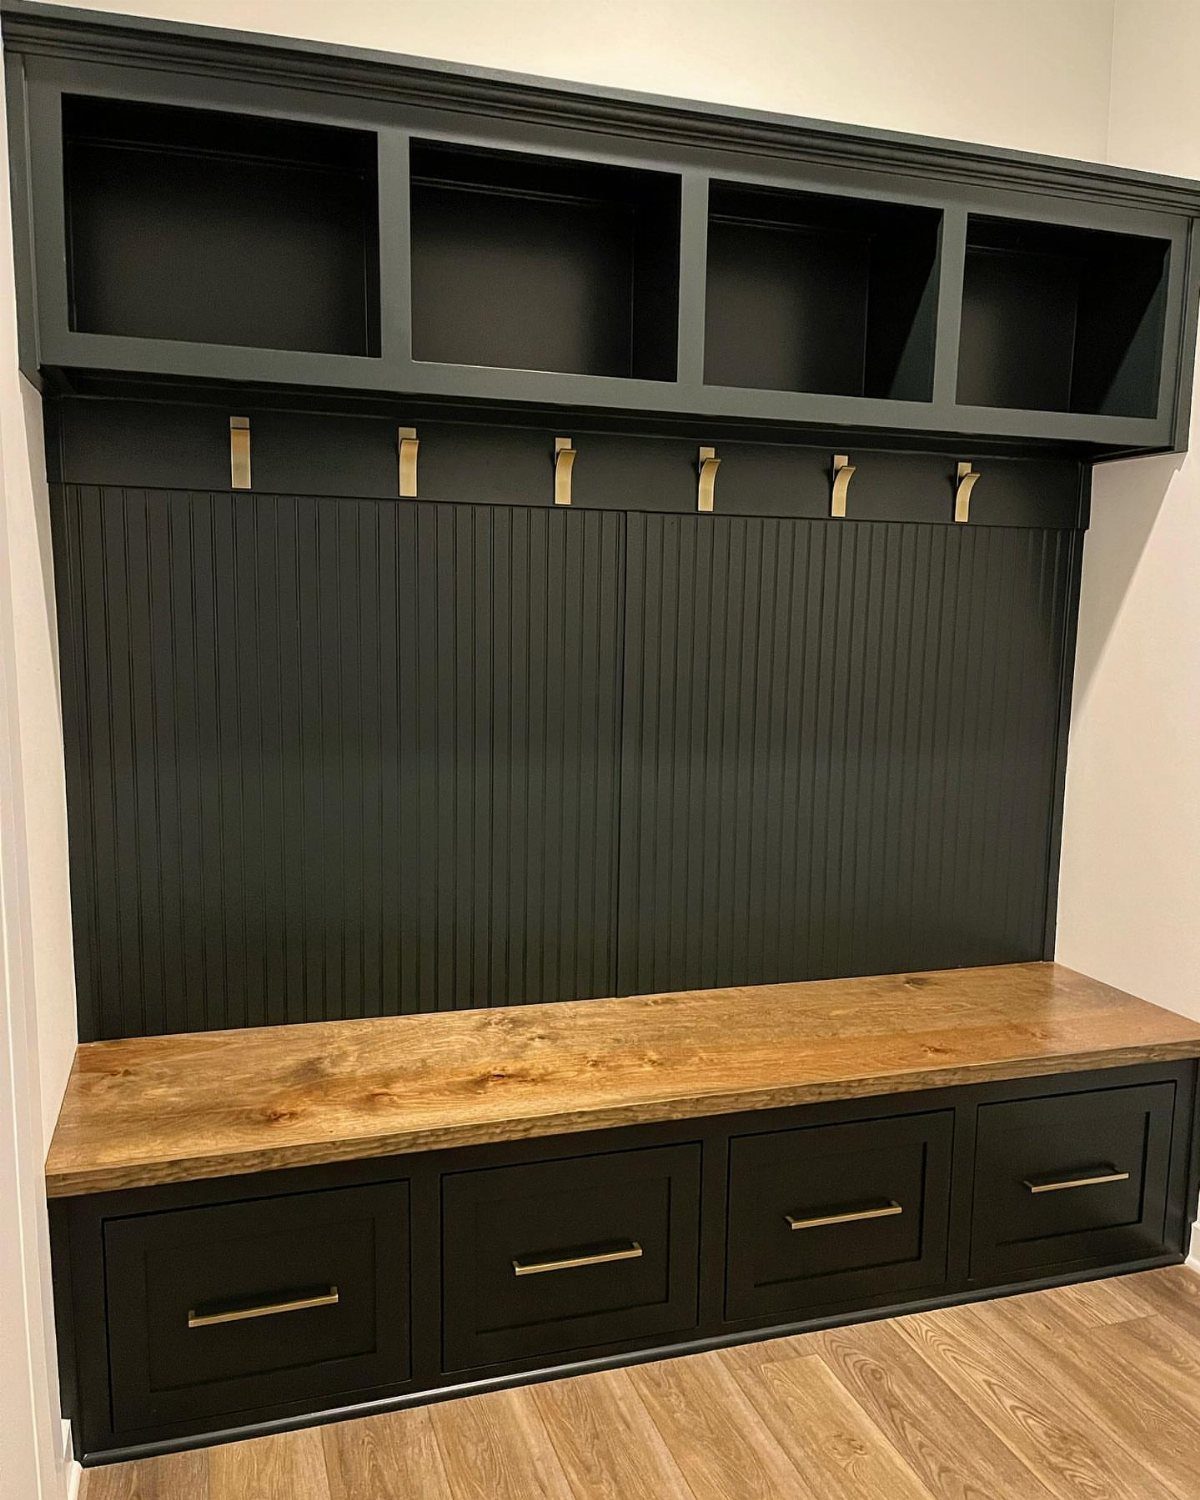
Paint is the cheapest way to make a plain bench unit look custom, and black on the cabinet body with a natural wood top is a combination I would pick again.
The wood warms up the dark color and takes the wear.
Sand, prime, then use a durable cabinet-grade paint on the frame and drawer fronts. Keep the seat in a clear protective finish rather than paint, since that is the surface that gets sat on and scuffed.
Dark paint shows dust and scratches, so buy a small touch-up can with the first gallon.
3. Mudroom Bench with Hooks
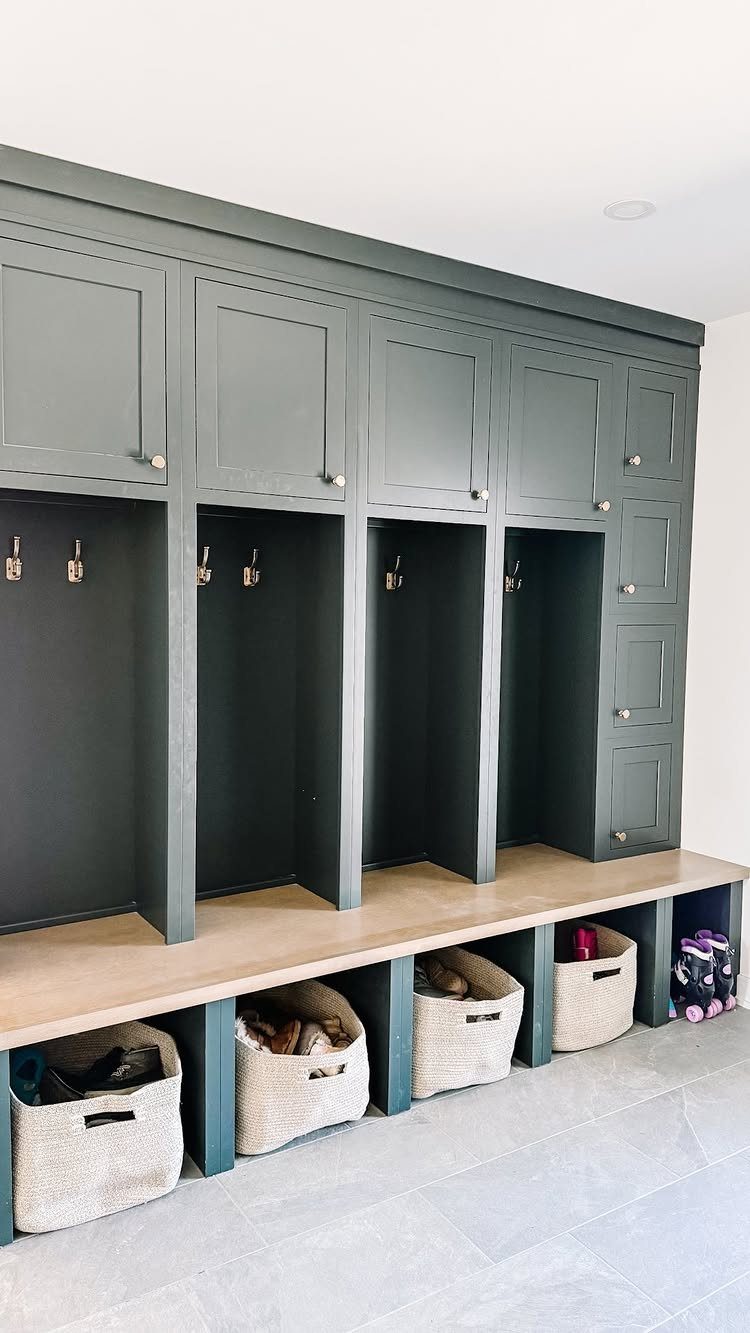
Hooks do the job that a bench alone cannot: they get coats and bags off the seat and onto the wall.
Set inside open cubbies, as in this dark green unit, they also keep the clutter framed instead of spread across the wall.
Plan one hook per person, plus a few extras for guests, and mount them at two heights if kids use the space. Screw into studs or use proper anchors; a loaded backpack pulls harder than you would guess.
Woven baskets underneath catch shoes, so the floor stays clear.
4. Built in Mudroom Bench
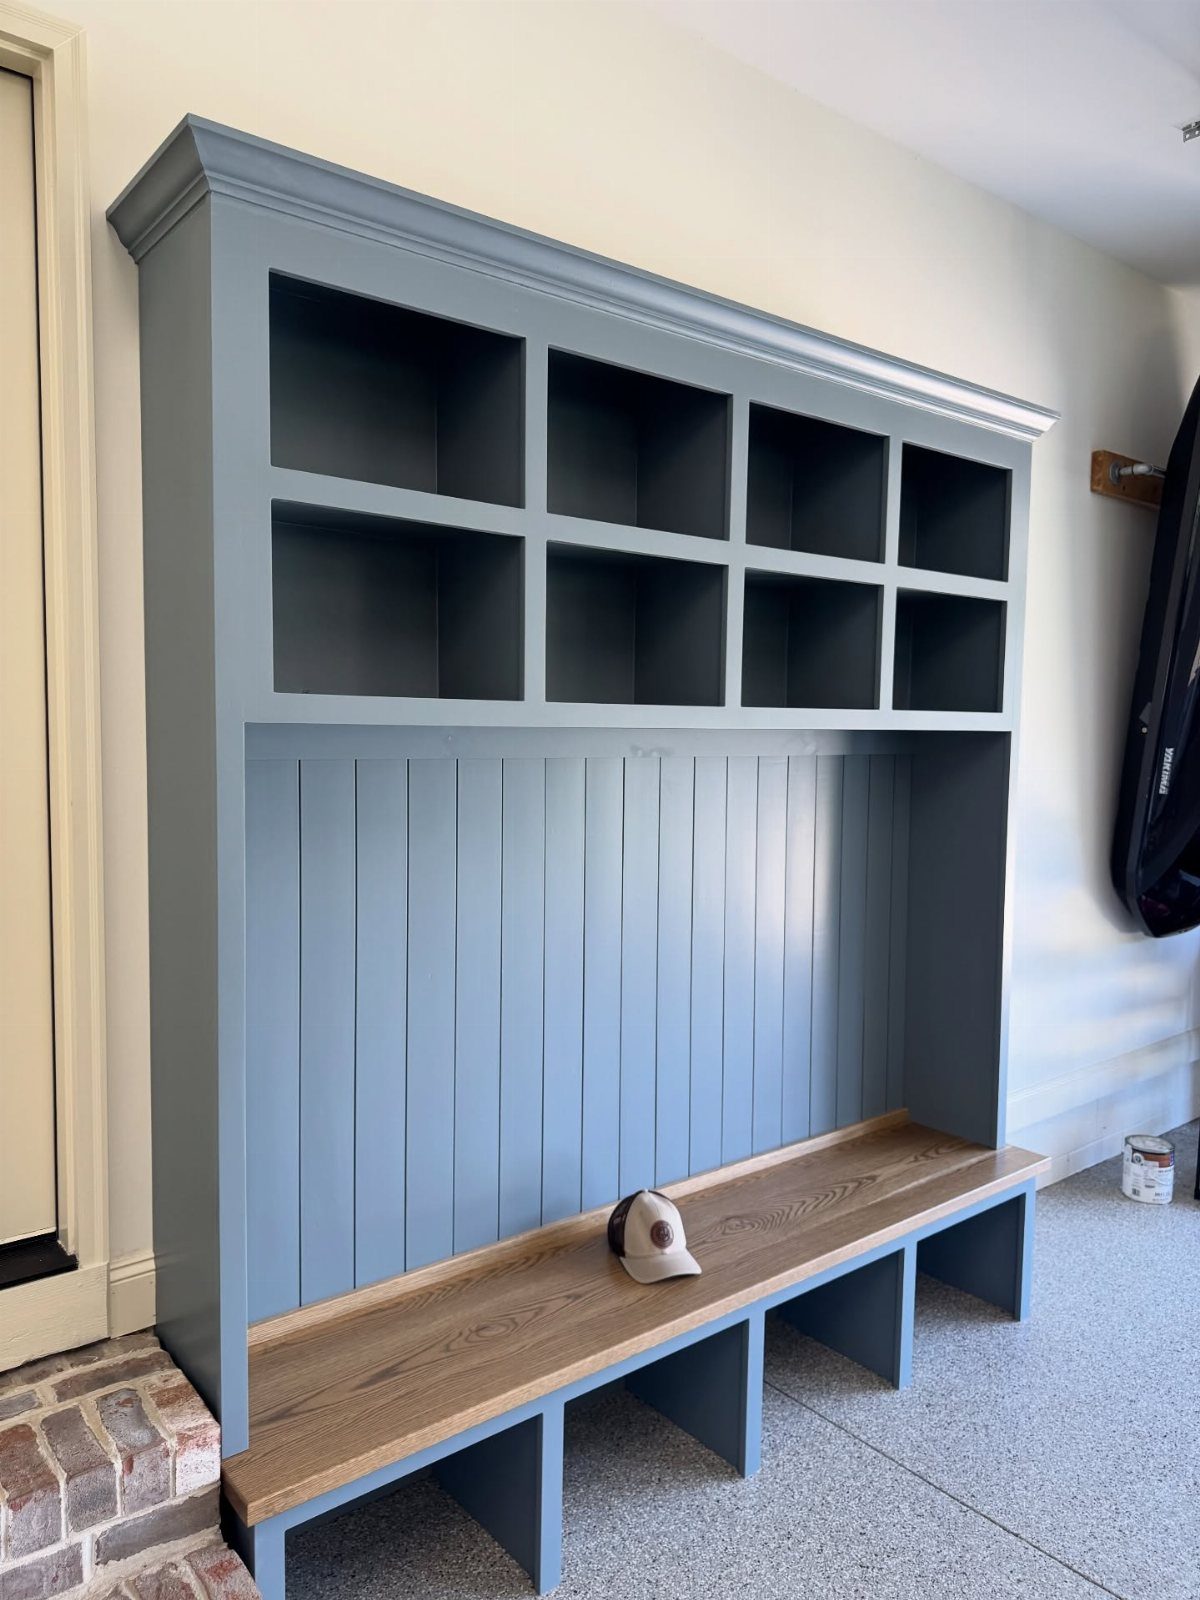
Build the seat first and let everything else rest on it. A solid wood seat, a plain frame, and vertical paneling behind it give you a bench that looks original to the house rather than added later.
Vertical paneling is also forgiving: it hides wall flaws and gives you a surface to fasten hooks and shelves to. Open cubbies above keep the cost down because you skip doors and hinges.
A bench like this suits a garage entry or a narrow hall, where an open, hard-wearing setup beats anything fussy.
5. Built-In Mudroom Cabinet
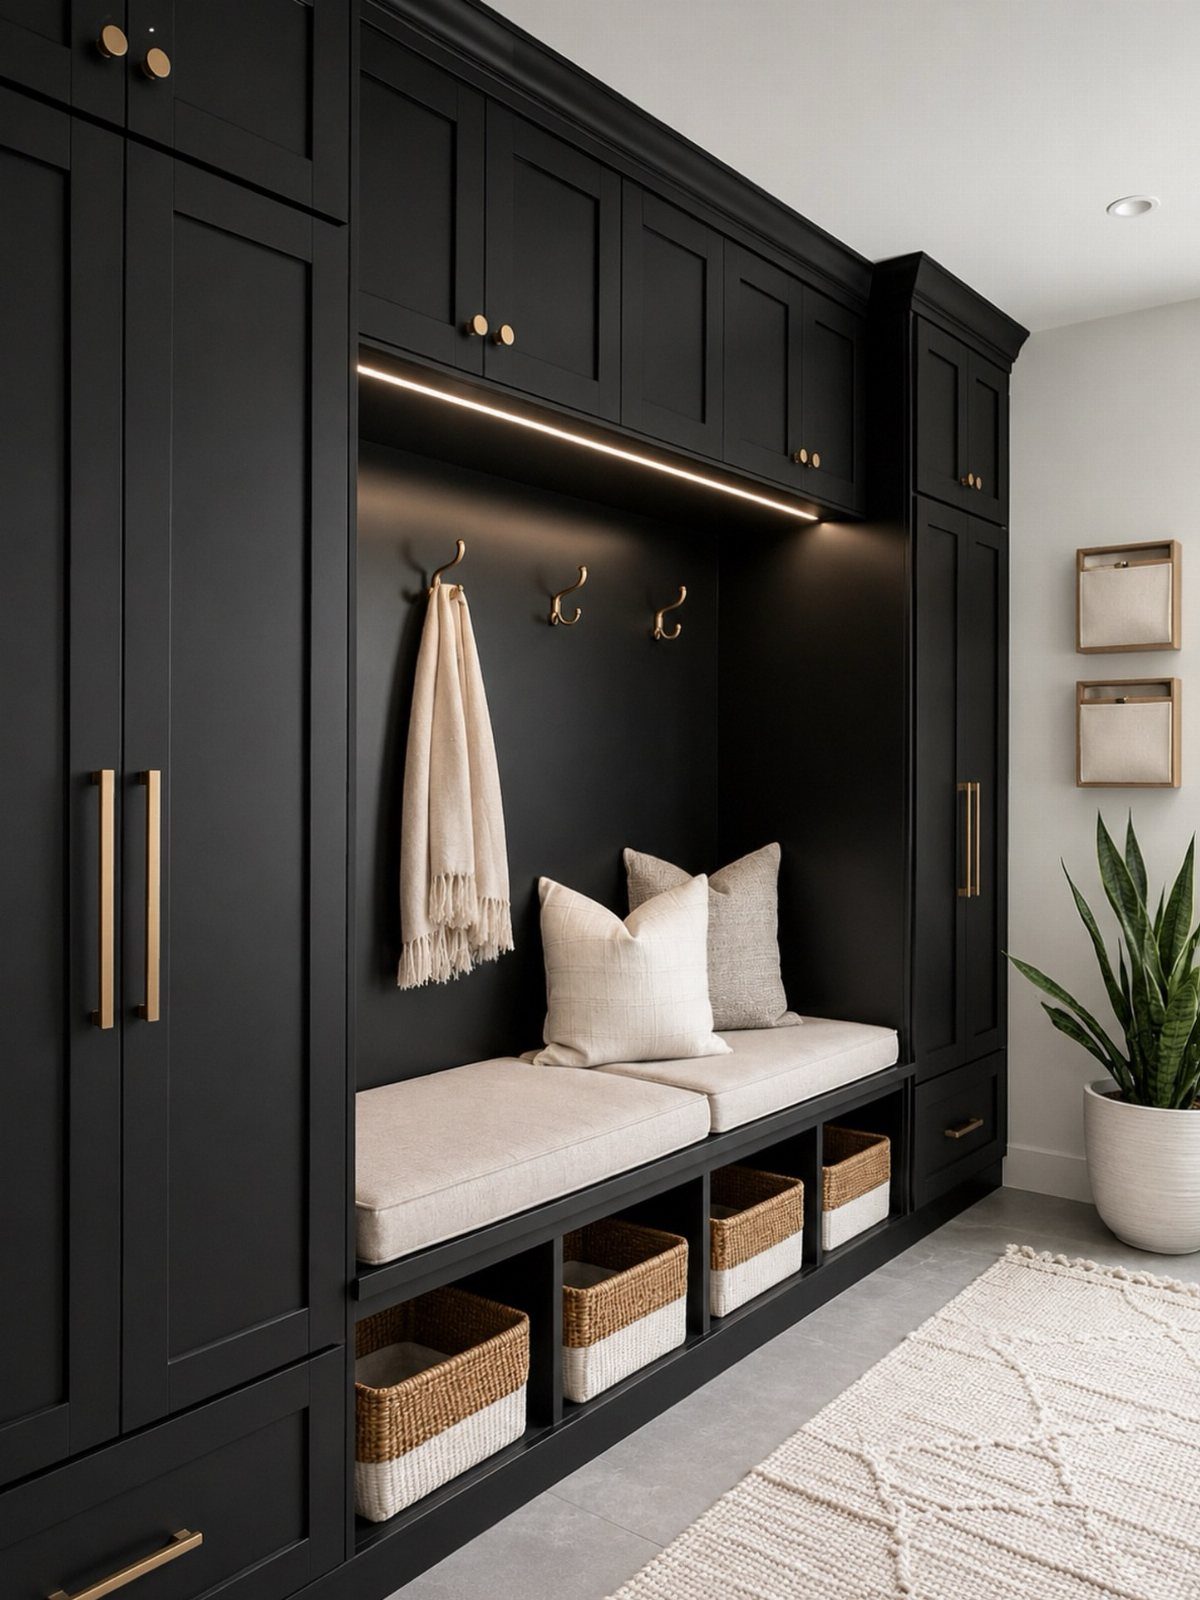
A built-in cabinet turns the bench into one piece of furniture: seat, baskets below, closed cabinets above. Nothing is left floating, so the whole unit reads as built into the wall rather than parked against it.
Closed upper cabinets are my pick for anyone who dislikes visual clutter, since they hide the mess that open cubbies show. The cushioned seat is comfortable for pulling on boots, though a fabric top needs more cleaning than wood.
Gold hardware against black is a small spend with a big effect, and it is easy to swap later.
6. Corner Mudroom Bench
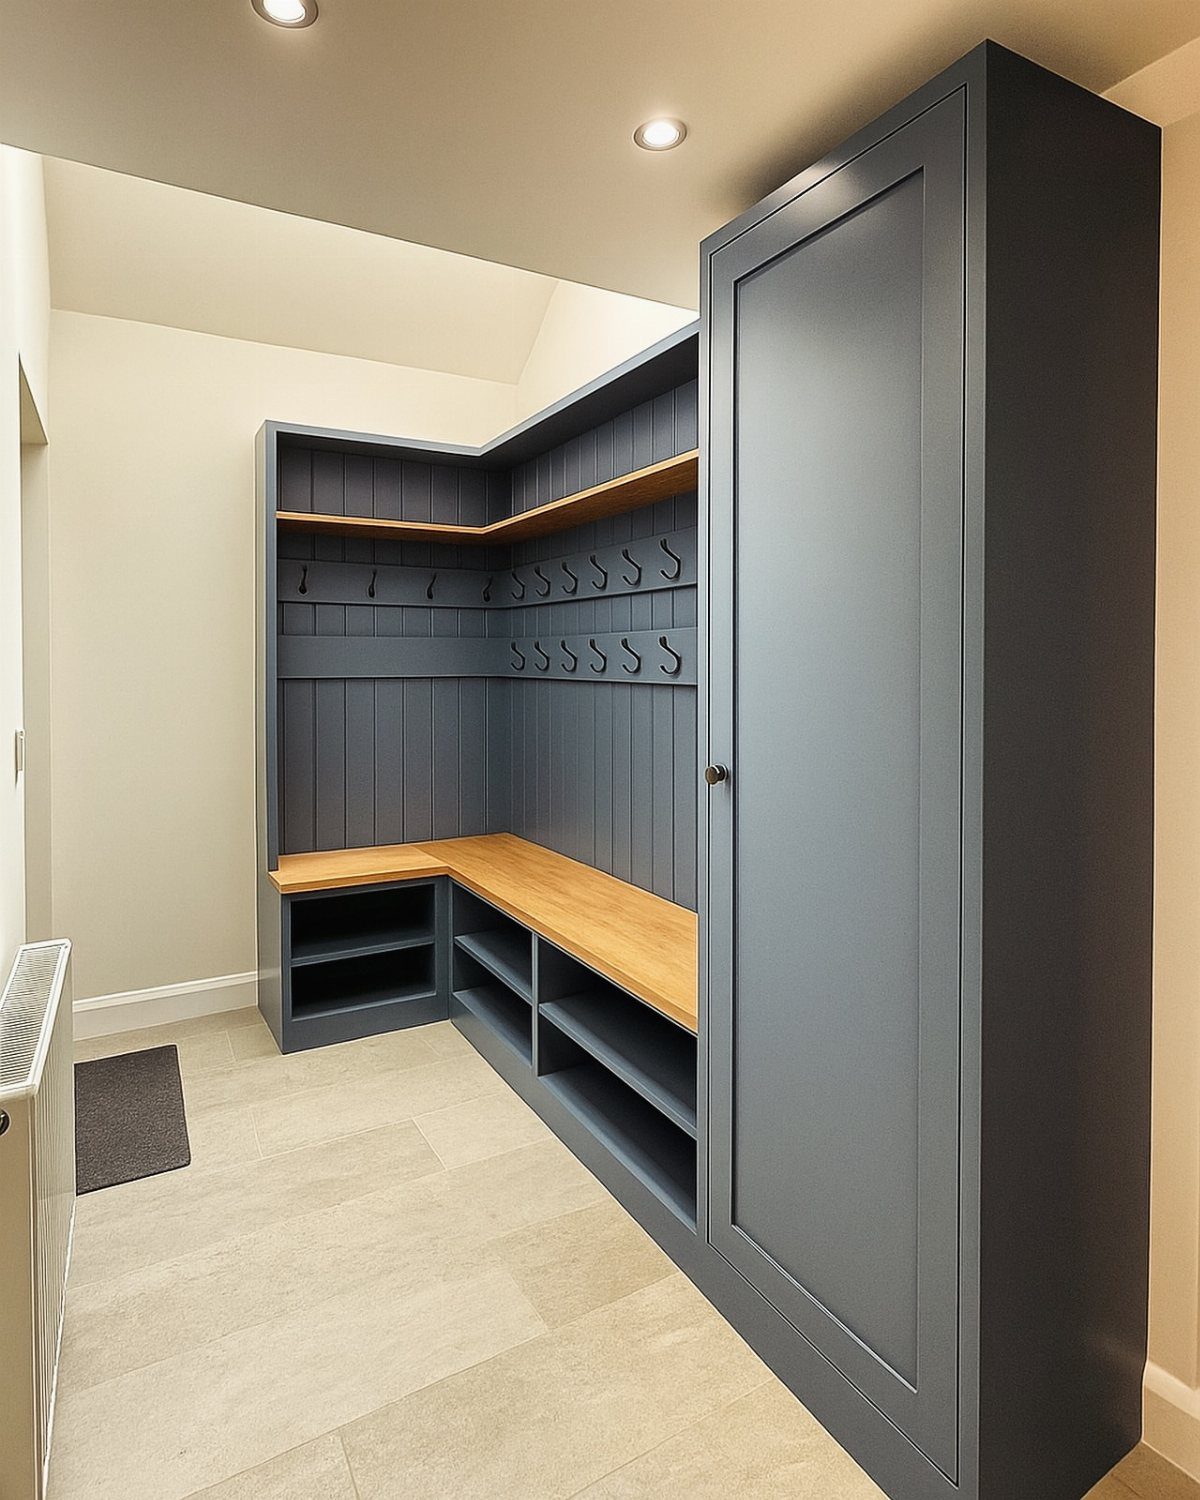
An L-shaped bench makes use of a corner that would otherwise sit empty, giving you two seating runs from one footprint. That means room to sit and pull on shoes without waiting for someone else to finish.
Measure both walls carefully, because corners are rarely square. Cut the seat pieces with a mitered or butted joint and scribe the ends to the wall for a tight fit.
Open shelving below holds shoes, while the tall cabinet beside it takes the items you want out of sight.
7. Bench with Open Shoe Cubbies
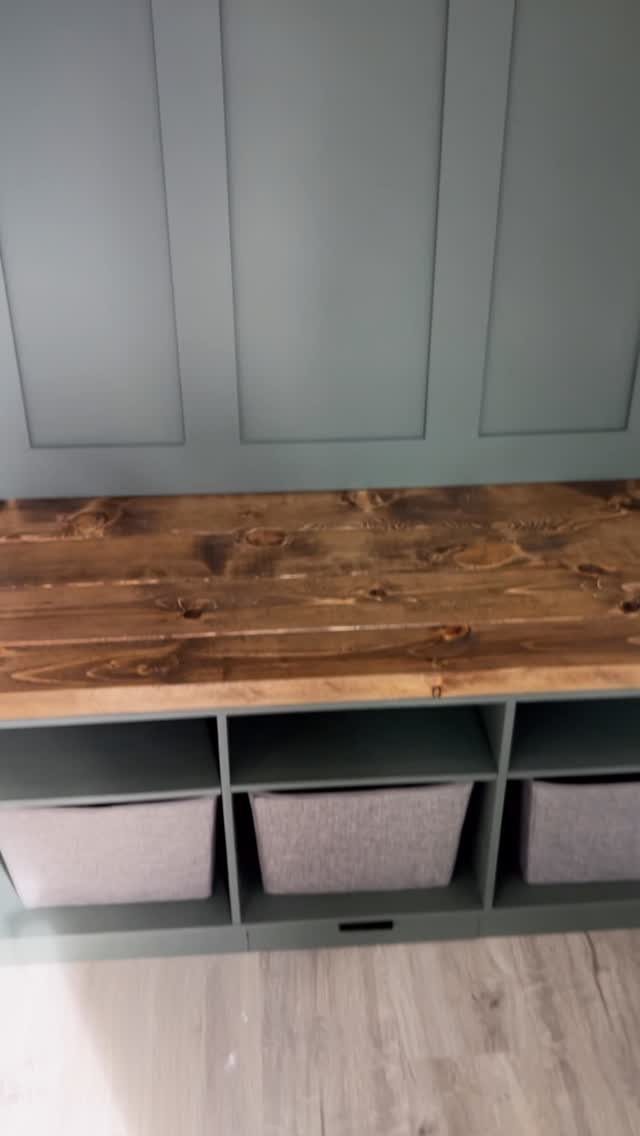
Open cubbies under the seat turn the bench into a landing spot for shoes, and the wood top gives you a surface that takes daily sitting.
Fabric baskets slotted into the cubbies give each person a bin of their own, which keeps hats, gloves, and loose socks from piling up on the bench.
Measure the cubby openings before buying baskets, since a snug fit looks built in and a loose one looks like leftovers. Skip doors and hinges, and the build gets cheaper.
I would label the baskets by person or by item type.
8. Flip-Top Storage Bench
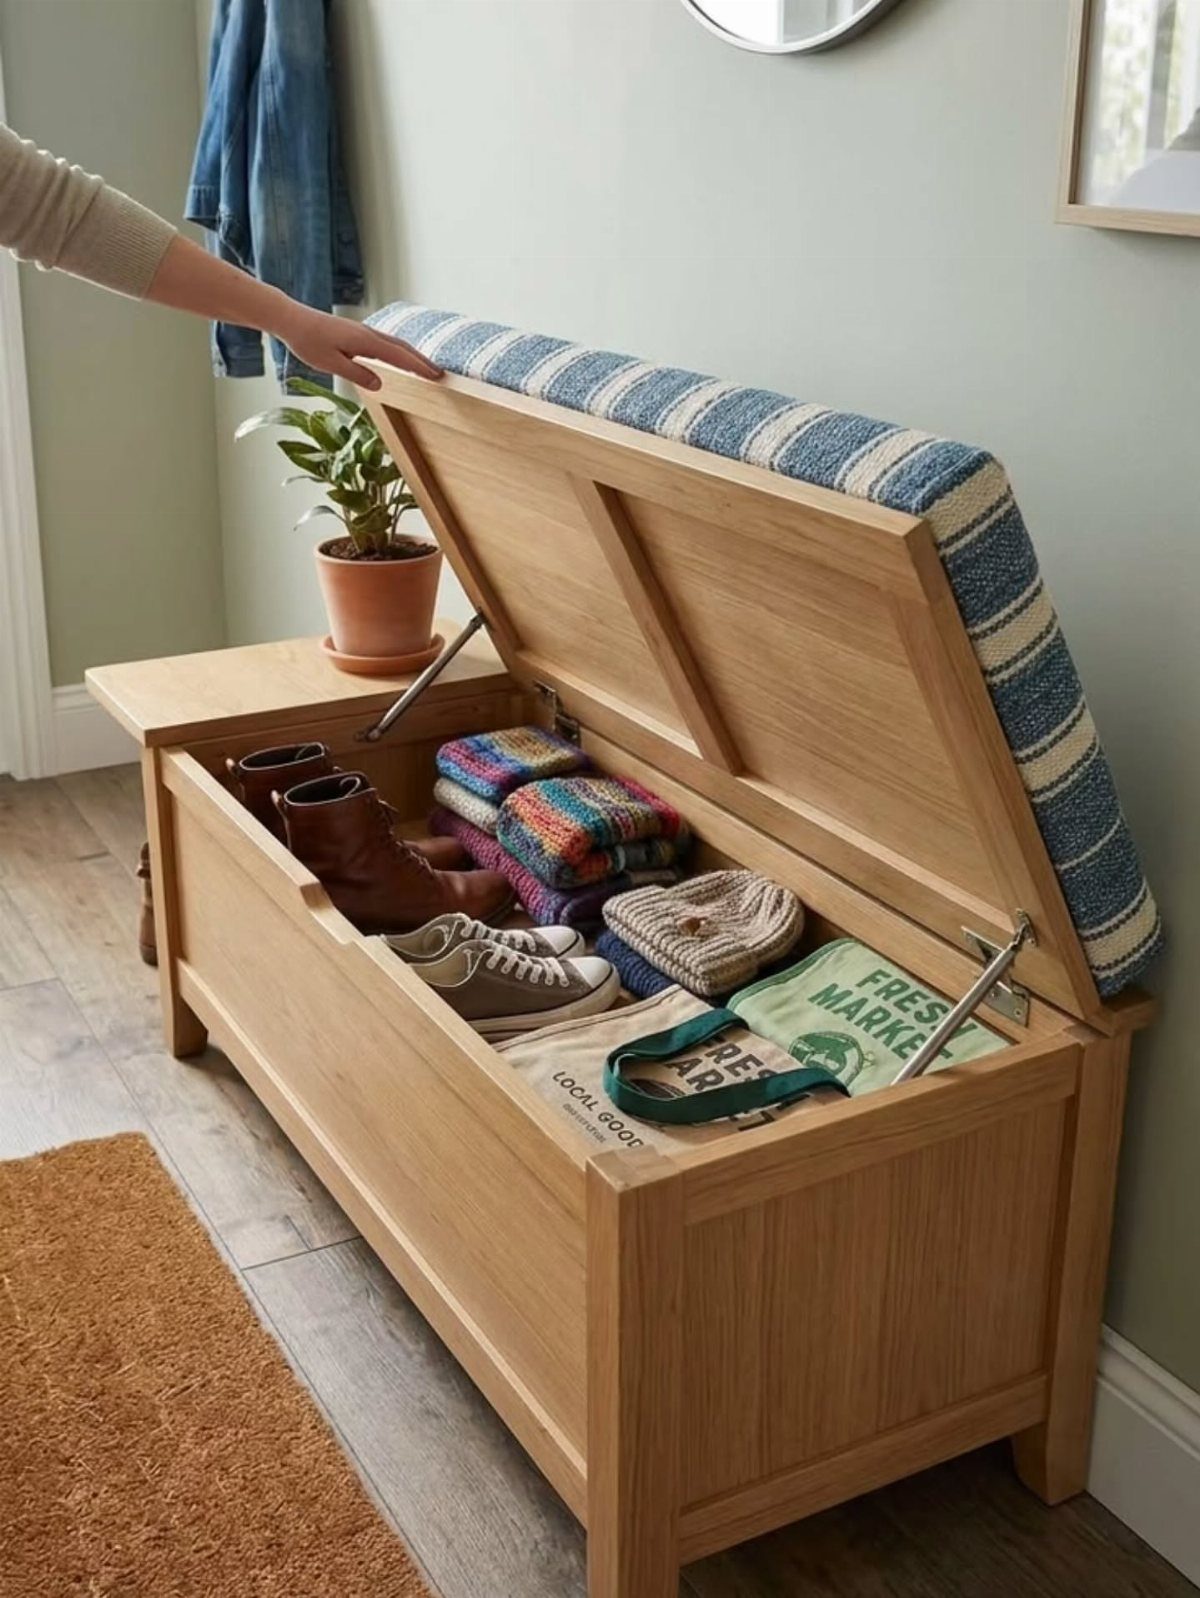
A hinged lid hides a whole storage chest inside the seat, which is why a flip-top bench is the one I would choose for a mudroom that needs to look calm.
Boots, sweaters and spare bags all disappear when the lid drops.
Fit a lid support or soft-close hinge so the top never slams on fingers. Keep the lid in a hard-wearing finish, since it takes the sitting.
The trade-off: you have to open it every time, and things at the bottom get forgotten. Use it for off-season items, not daily shoes.
9. Modern Slat Wall Mudroom Bench
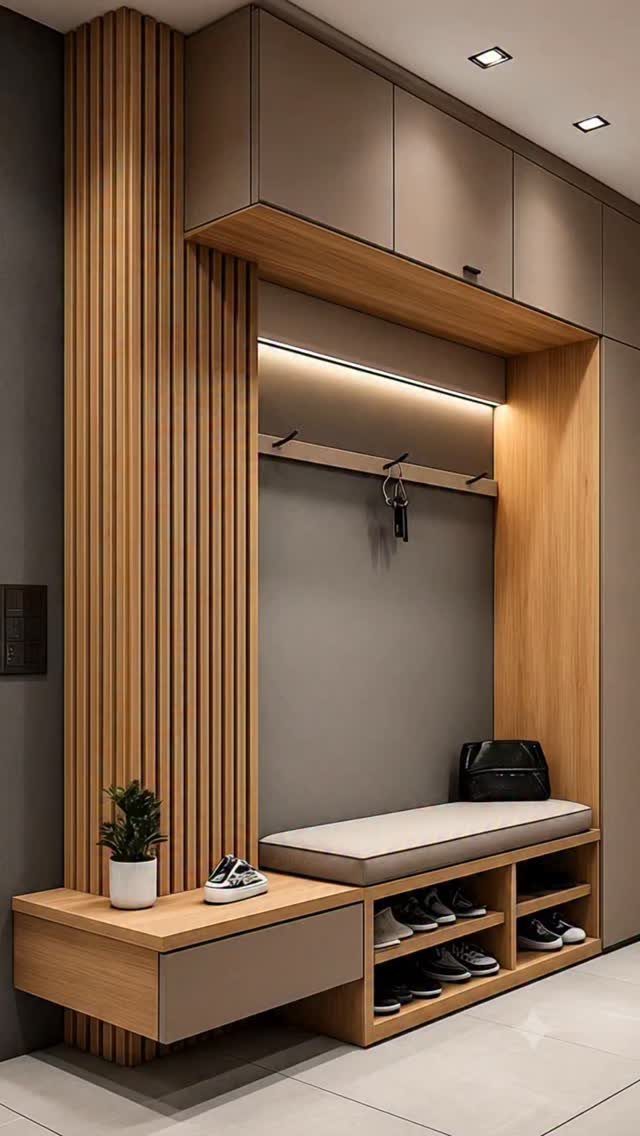
Vertical wood slats add warmth behind a grey bench, and they give the wall a finished, modern look without any fussy trim. With overhead cabinets and shoe cubbies in the same run, the whole unit reads as one planned piece.
Slats are a good place to hide wiring for lighting, so plan any lights before you fasten them. I would keep the slat spacing even and the wood tone close to the bench top.
Closed overhead cabinets keep the slats from competing with visible clutter.
Tools Needed
A table saw, miter saw, cordless drill, and brad nailer cover most of a built-in bench. A circular saw with a guide can stand in for the table saw if you don’t own one.
Add a few things people forget: a square, a measuring tape, bar clamps, a random orbit sander, and a countersink bit (#8) so screw heads sit flush. Safety glasses and hearing protection belong on the list too.
A Kreg jig drills angled pocket holes, so the frame joints stay hidden and hold tight with nothing more than glue and screws.
Borrow or rent the saws before buying them. A weekend project rarely justifies new stationary tools.
Design Considerations
Start with depth and height. An 18-inch-deep, roughly 18-inch-tall bench is comfortable to sit on and fits standard baskets, so buy the baskets first and build around them.
Before building, put the baskets on the floor and mark their footprint with painter’s tape, then walk through to see how much room is left to move.
Then look at what’s already in the space: floor vents, baseboard, and trim. A vent under the bench can be flipped around or sunk into the flooring so the bench sits flush.
Count cubbies by dividing the wall width by your basket width. If a gap is left over, such as 7 inches, build one small cubby to fill it rather than leaving dead space at the wall.
Last, choose the trim. 1×2 square pine on the front edges is one simple option, and it should echo the other trim in your home.
Durability Tips
Start at the floor. Carpet and mudrooms don’t mix, so replace it with a hard surface like laminate.
Running the same flooring from the adjacent room into the bench area ties the 2 spaces together and stands up better to muddy boots and daily foot traffic.
If you build the bench from MDF, treat it as a sponge, because it is extremely absorbent. Wet boots and rain jackets will make it swell unless it’s sealed.
Use an oil-based primer first, then a water-based paint on top. Prime every edge and all the inside surfaces, not just the faces you can see.
Sand between coats with 180-grit and finish with 220-grit for a smooth surface that wipes clean.
Frequently Asked Questions
What is a good height for a mudroom bench?
Aim for about 18 inches, which is comfortable for sitting and pulling on boots.
Pair that with a depth of about 18 inches so standard baskets fit underneath. Pick your baskets before you cut anything, since their size sets the cubby openings and the bench height with them.
How much would it cost to build a bench?
Expect roughly $40 to $115, depending on the materials you choose.
You can keep the number down by leaving off doors and hinges and using open cubbies. Renting or borrowing the saws, instead of buying them, also helps on a weekend project.
How do I build a mudroom addition?
Start with the space, the design, and the materials, since those three decide whether the addition works day to day.
For a simpler project, a built-in bench along a garage entry or narrow hall gives you seating and storage without adding any square footage.
For a simple bench, a circular saw, a miter saw, a drill, and a brad nailer cover nearly every cut and joint, and a table saw only speeds up the ripping.