The ideas here run from a lined jewelry drawer you can swap in over a weekend to a central island with room for shoes below, so cost and effort vary a lot.
What each of you owns decides which of these fits: a wardrobe of dresses and long coats needs different space than one of folded knits and tees, so the layout should differ too.
1. Jewelry Drawers
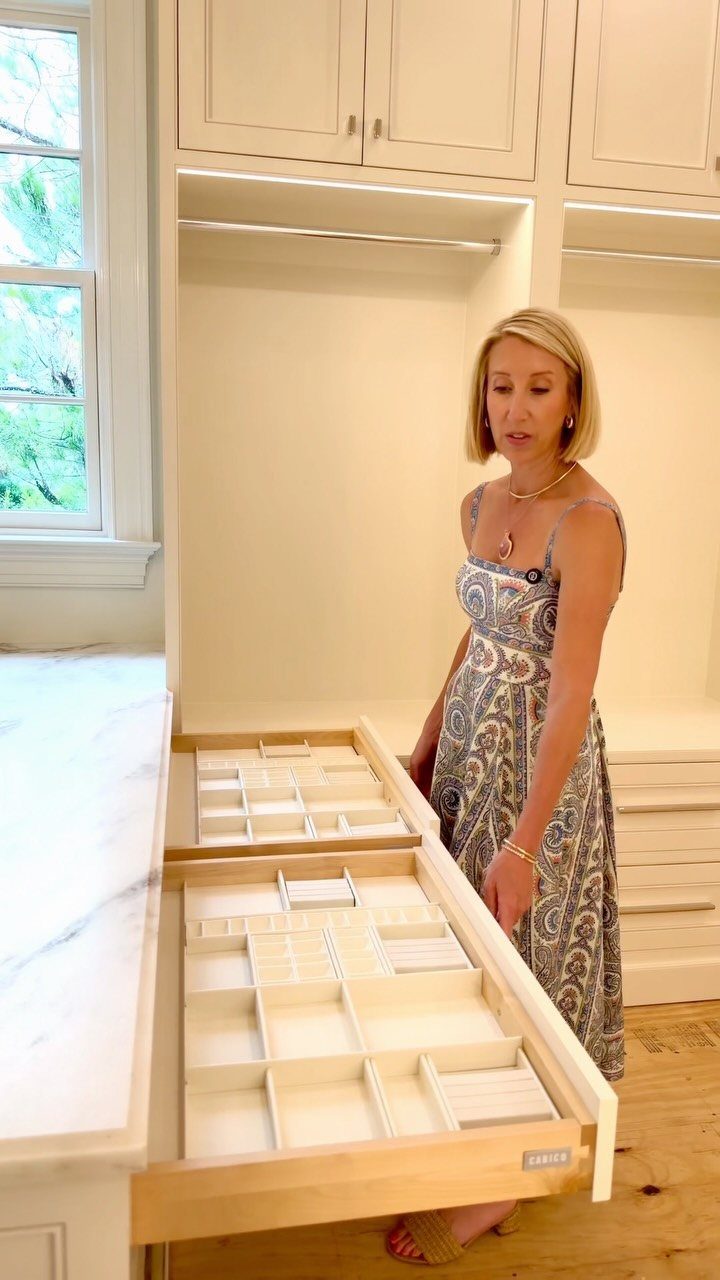
A shallow drawer with dividers does more for jewelry than any hanging organizer, because every piece lies flat and visible. Slot inserts or small compartments keep necklaces from knotting and earrings from drifting into one pile.
In a shared closet, give jewelry its own drawer near eye level for whoever wears it most, so it isn’t buried under sweaters. Lined inserts cost little and you can swap them in a weekend.
2. Consistent Finishes, Colors, and Hardware
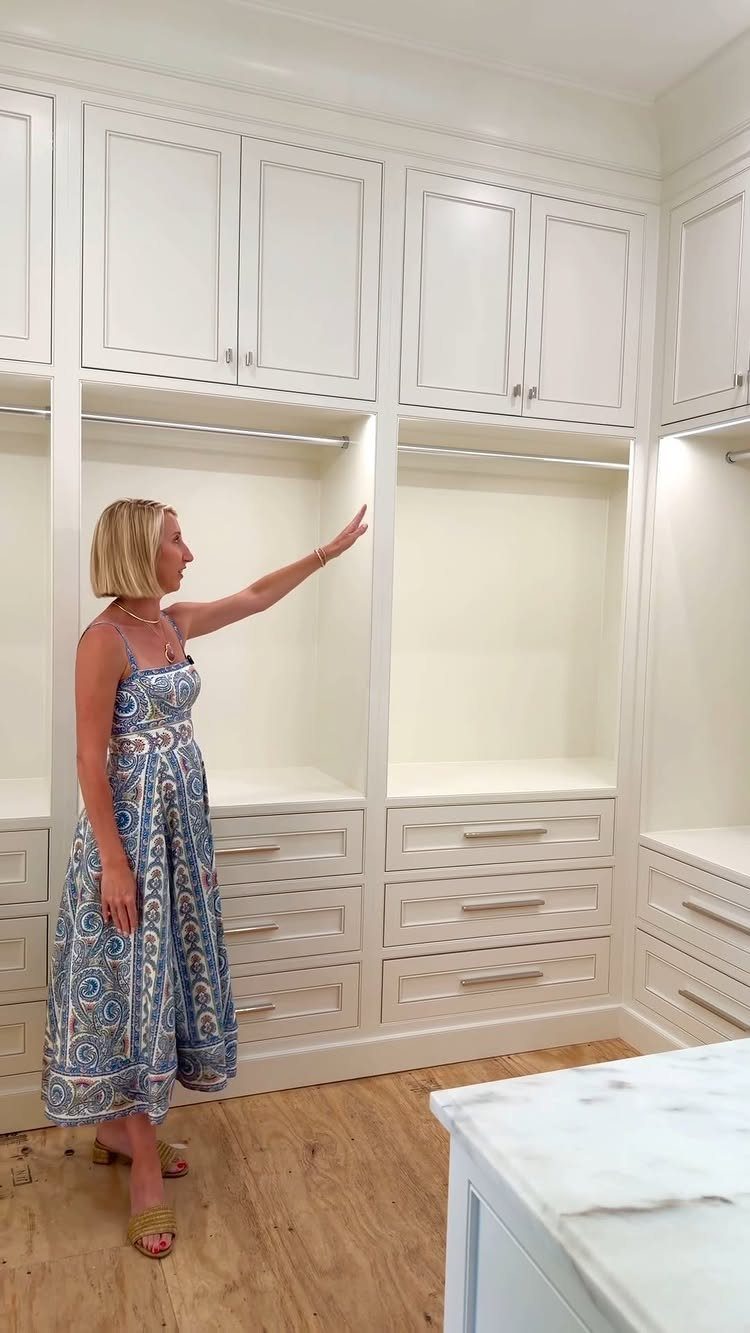
Matching cabinet fronts, one color family, and a single hardware finish make two wardrobes read as one plan. Silver pulls on every drawer and door do most of the work here.
In a shared closet, this is the least expensive fix for a mixed wardrobe that otherwise looks messy.
Settle on the finish first, then match every pull, rod, and handle to it. White cabinets with silver hardware stay neutral if either of you changes taste later.
3. Floor-to-ceiling Shelves and Double Hanging Rods
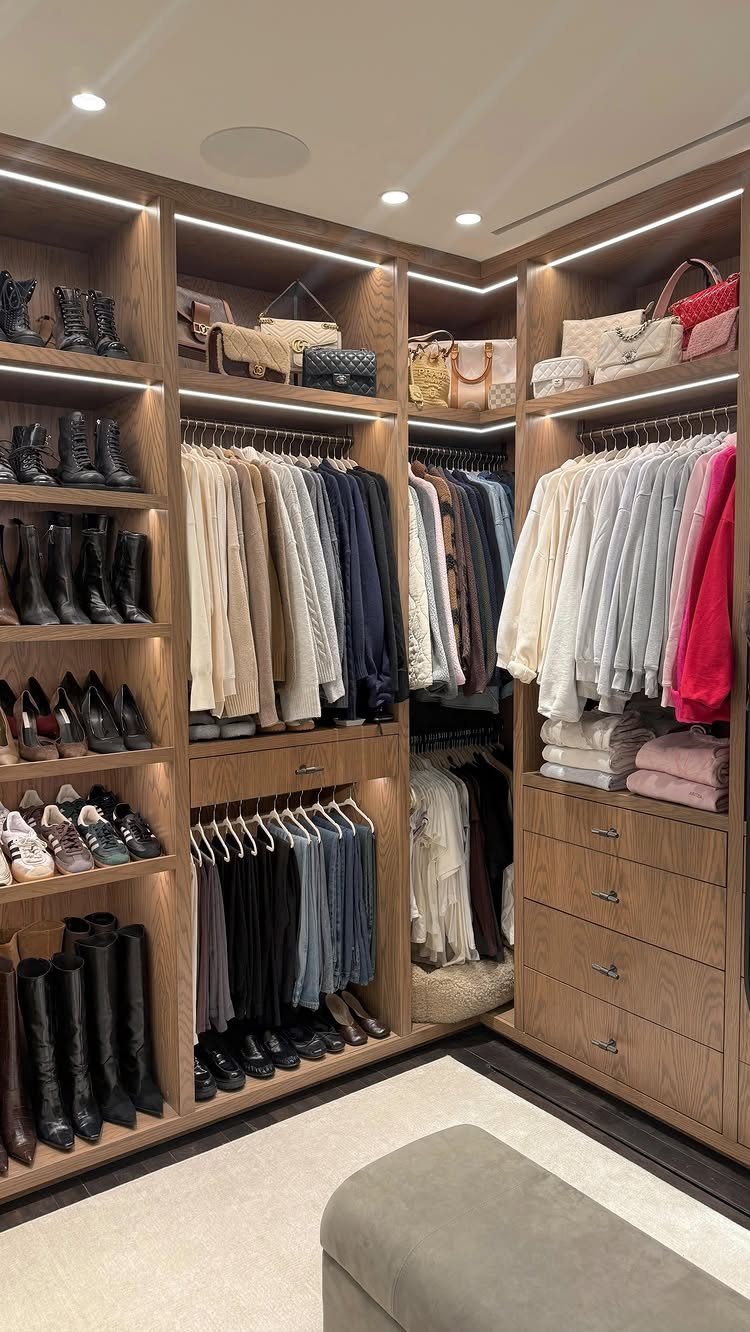
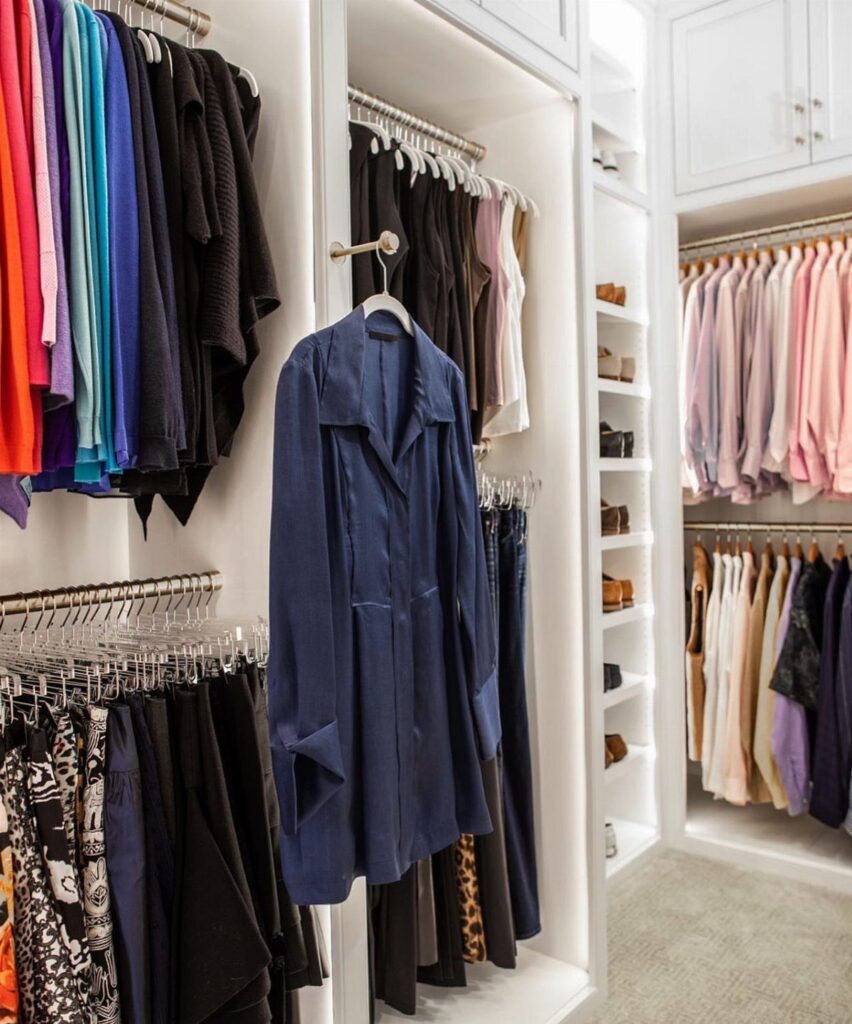
Shoes and bags fit on the shelves between the rods and the floor.
I’d put the upper rod only where the lower one still clears the garments below. Keep a step stool in the closet for top shelves, and save those for off-season items you rarely reach for.
4. Dedicated Shoe Shelving
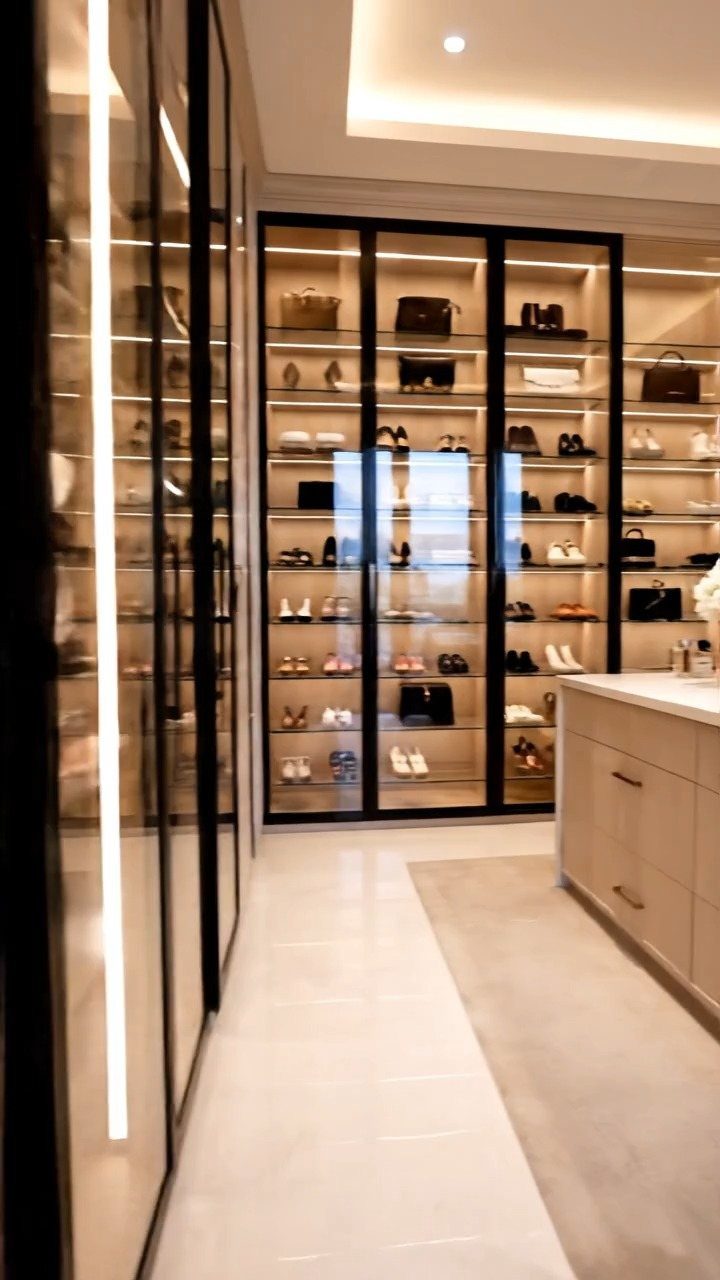
Shoes ruin a closet when they live on the floor, so give them their own cabinet or wall. Glass fronts keep dust off while still letting you see every pair, and built-in lighting makes finding a match quick.
Handbags can share the same cabinet if you leave a few taller shelves. On a smaller budget, open shelves with a lip do the job; glass doors are the upgrade.
5. Valet Rods
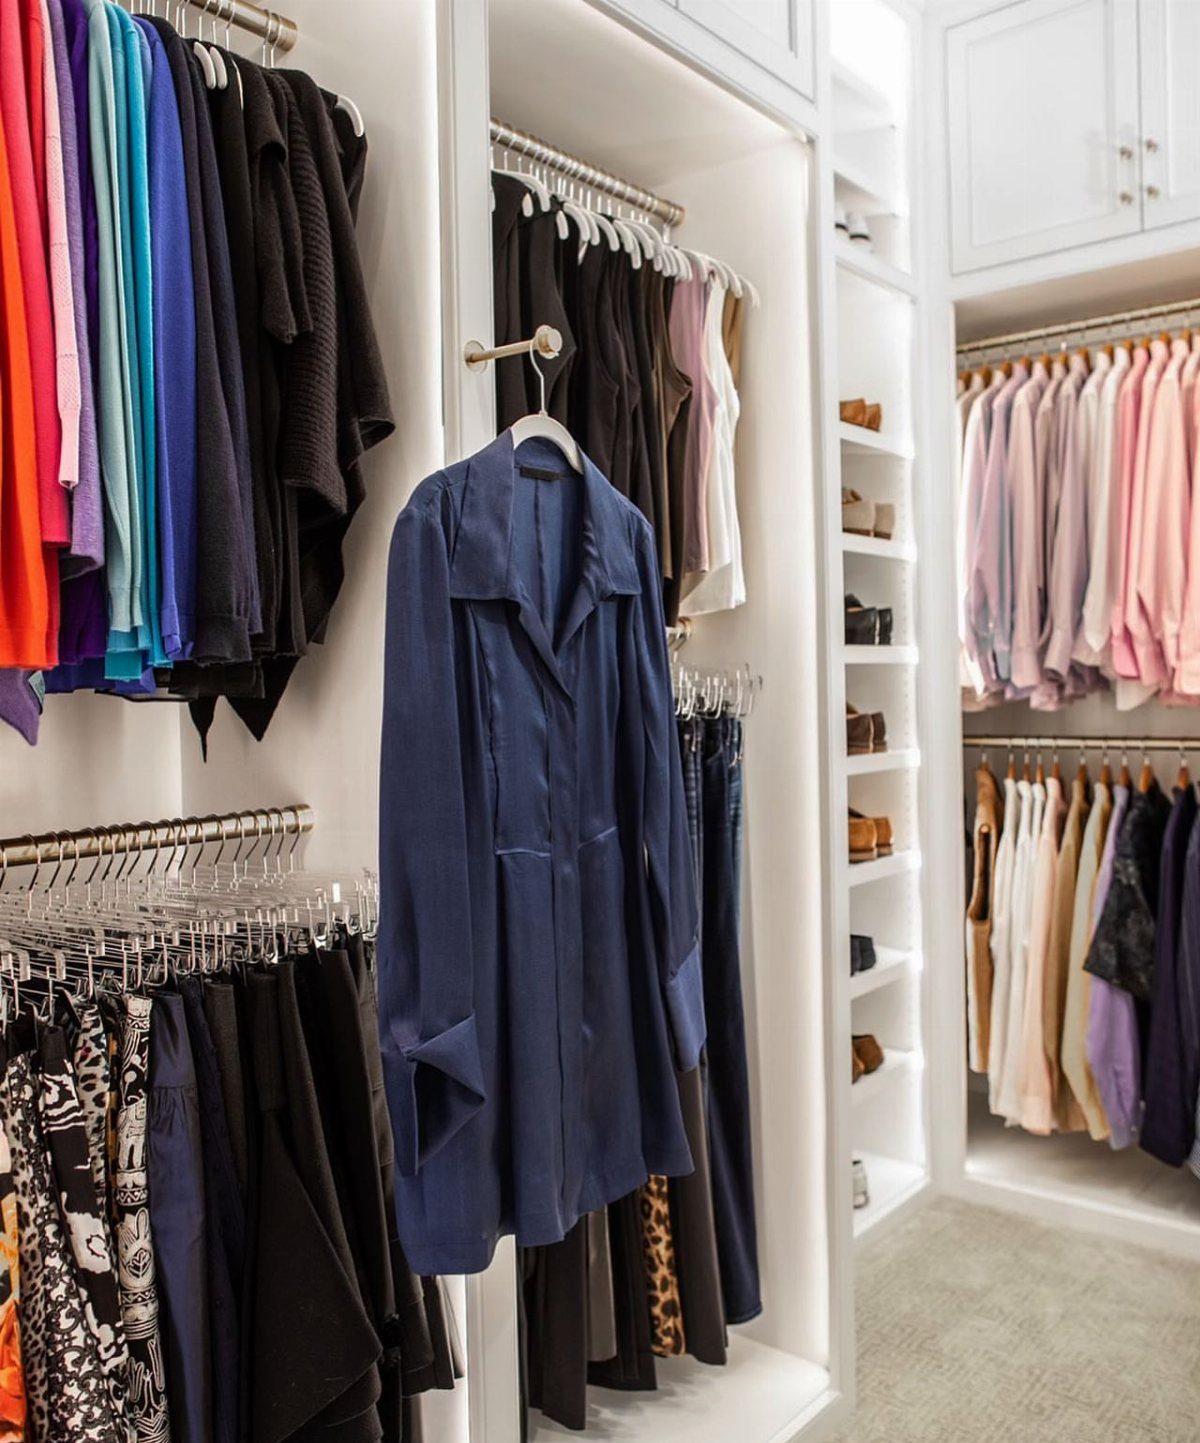
A retractable valet rod pulls out from the wall, holds an outfit at arm’s length, then slides away. It’s the best fix I know for the "wear it tomorrow" pile that ends up on a chair.
Mount it high enough that a long coat or dress clears the floor and the drawers below. Use it for tomorrow’s outfit or a few pieces headed to the cleaner, and keep it empty otherwise so it stays useful.
6. Central Island
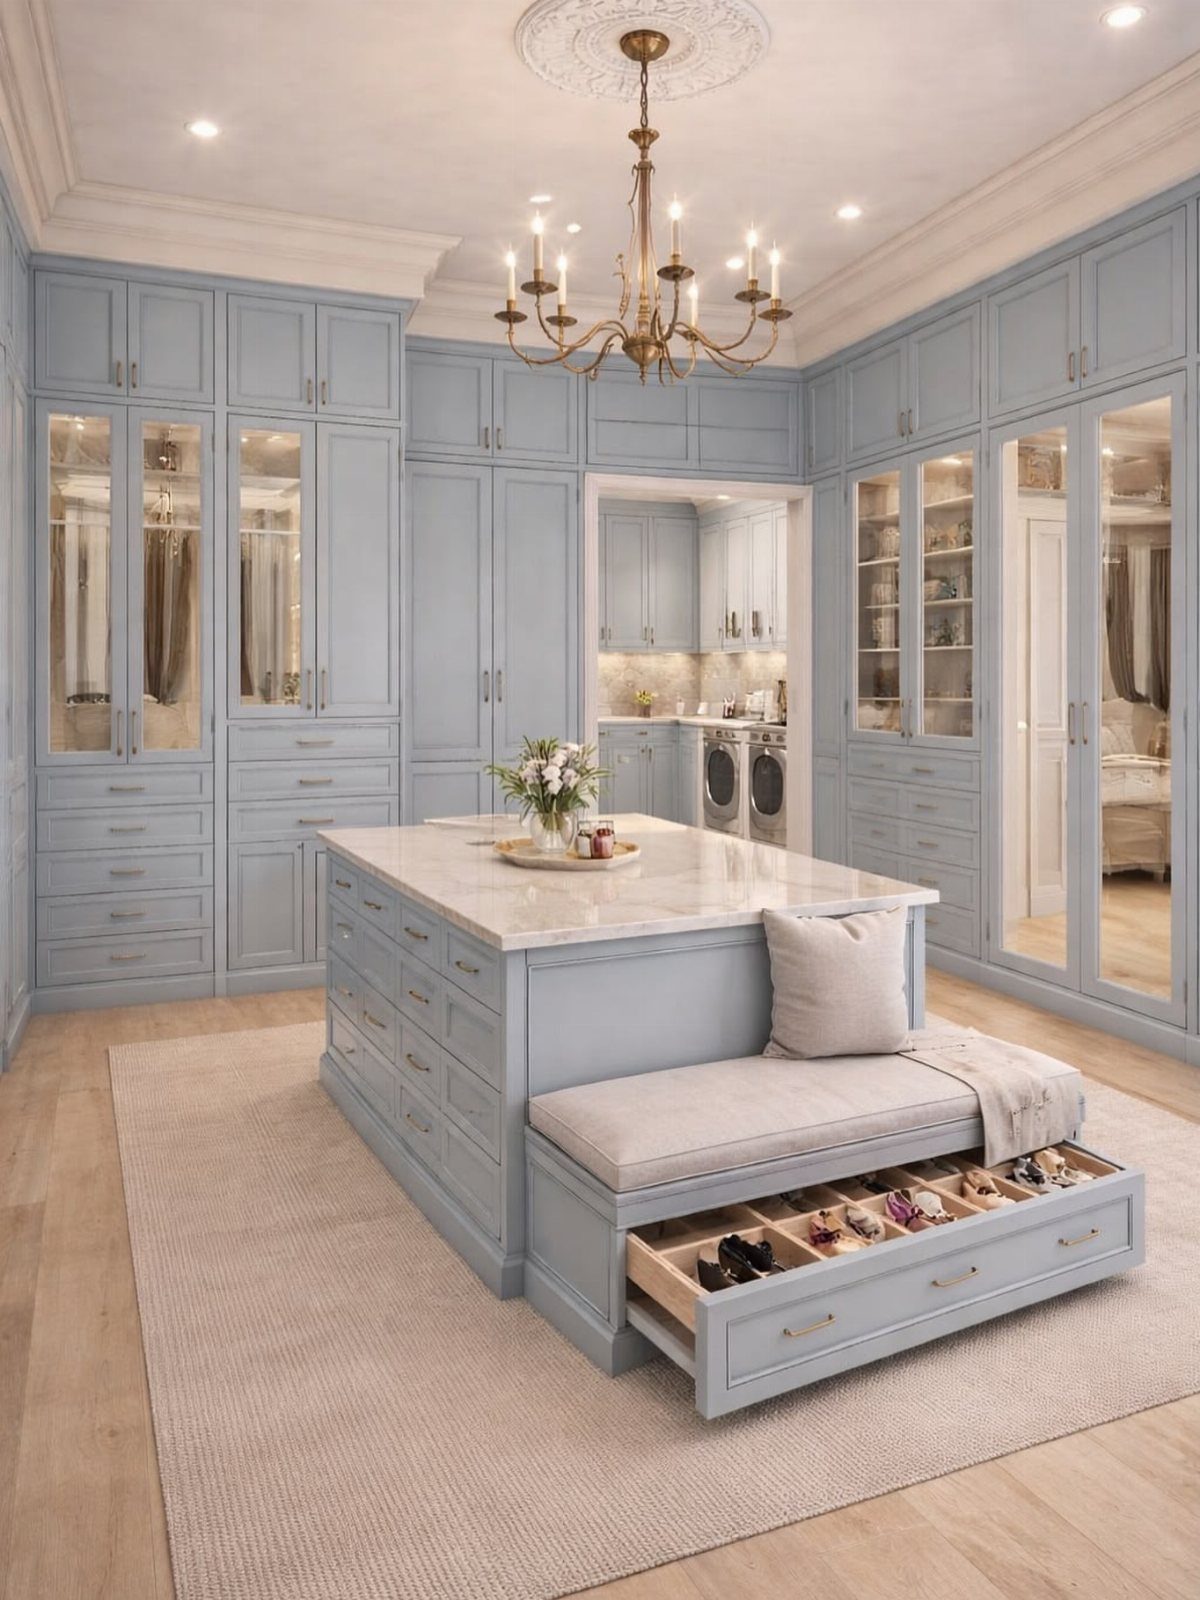
An island works in a closet only when the room is wide enough to walk around it comfortably, so measure before you commit. A marble top gives you a hard, clean surface for folding laundry or laying out outfits.
Shoe drawers in the base use space that would otherwise go to waste, and a built-in bench adds a spot to sit while you dress. In a shared closet, split the drawers so each of you has a side.
7. LED Strips and Pendant Lights
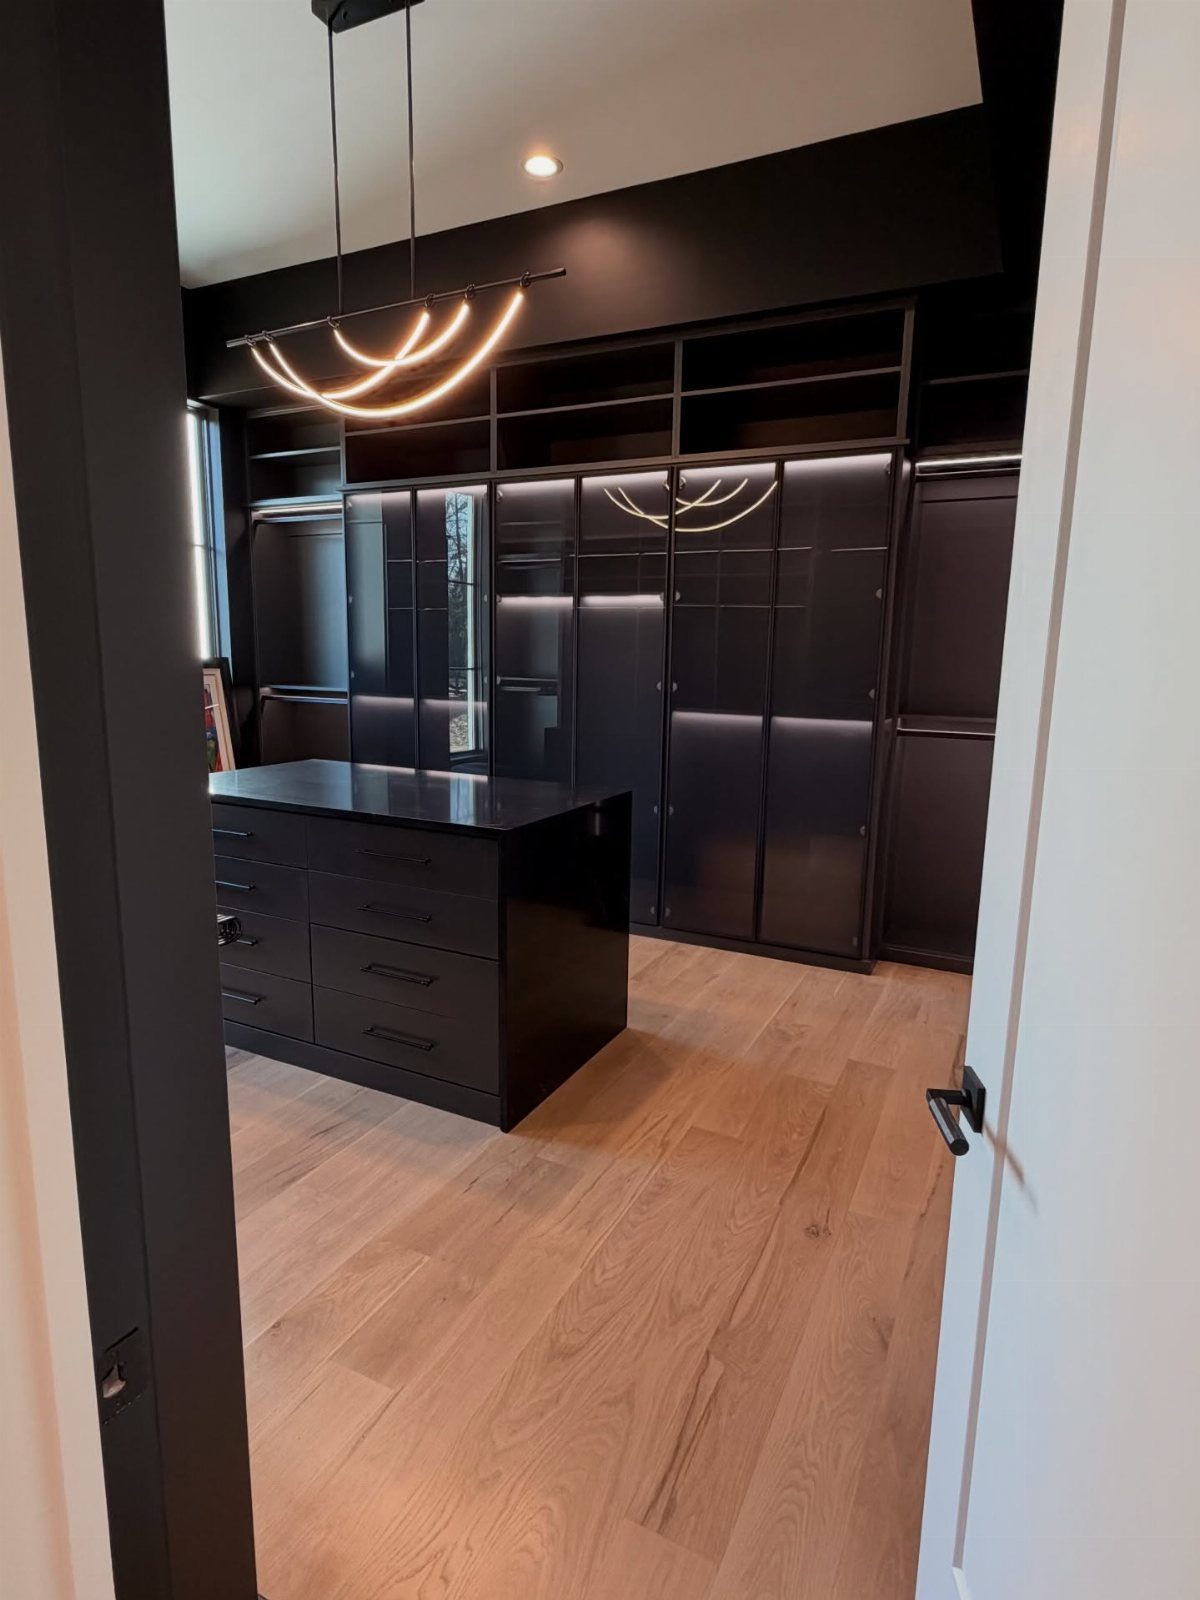
Light built into the shelving itself beats a single ceiling fixture, because it removes the shadows that fall across shelves and rods. LED strips tucked along shelf edges light each row of folded clothes without glare.
Hang a single pendant above the island and it gives the room a center point, plus a gentler glow that makes pairing shirts with pants easier than overhead light does.
I’d choose one fixture in a finish that echoes your hardware, so it looks planned alongside the rods and pulls instead of tacked on. Strips are the cheaper half of this idea and easy to add to an existing closet.
8. Symmetrical His and Hers Layout
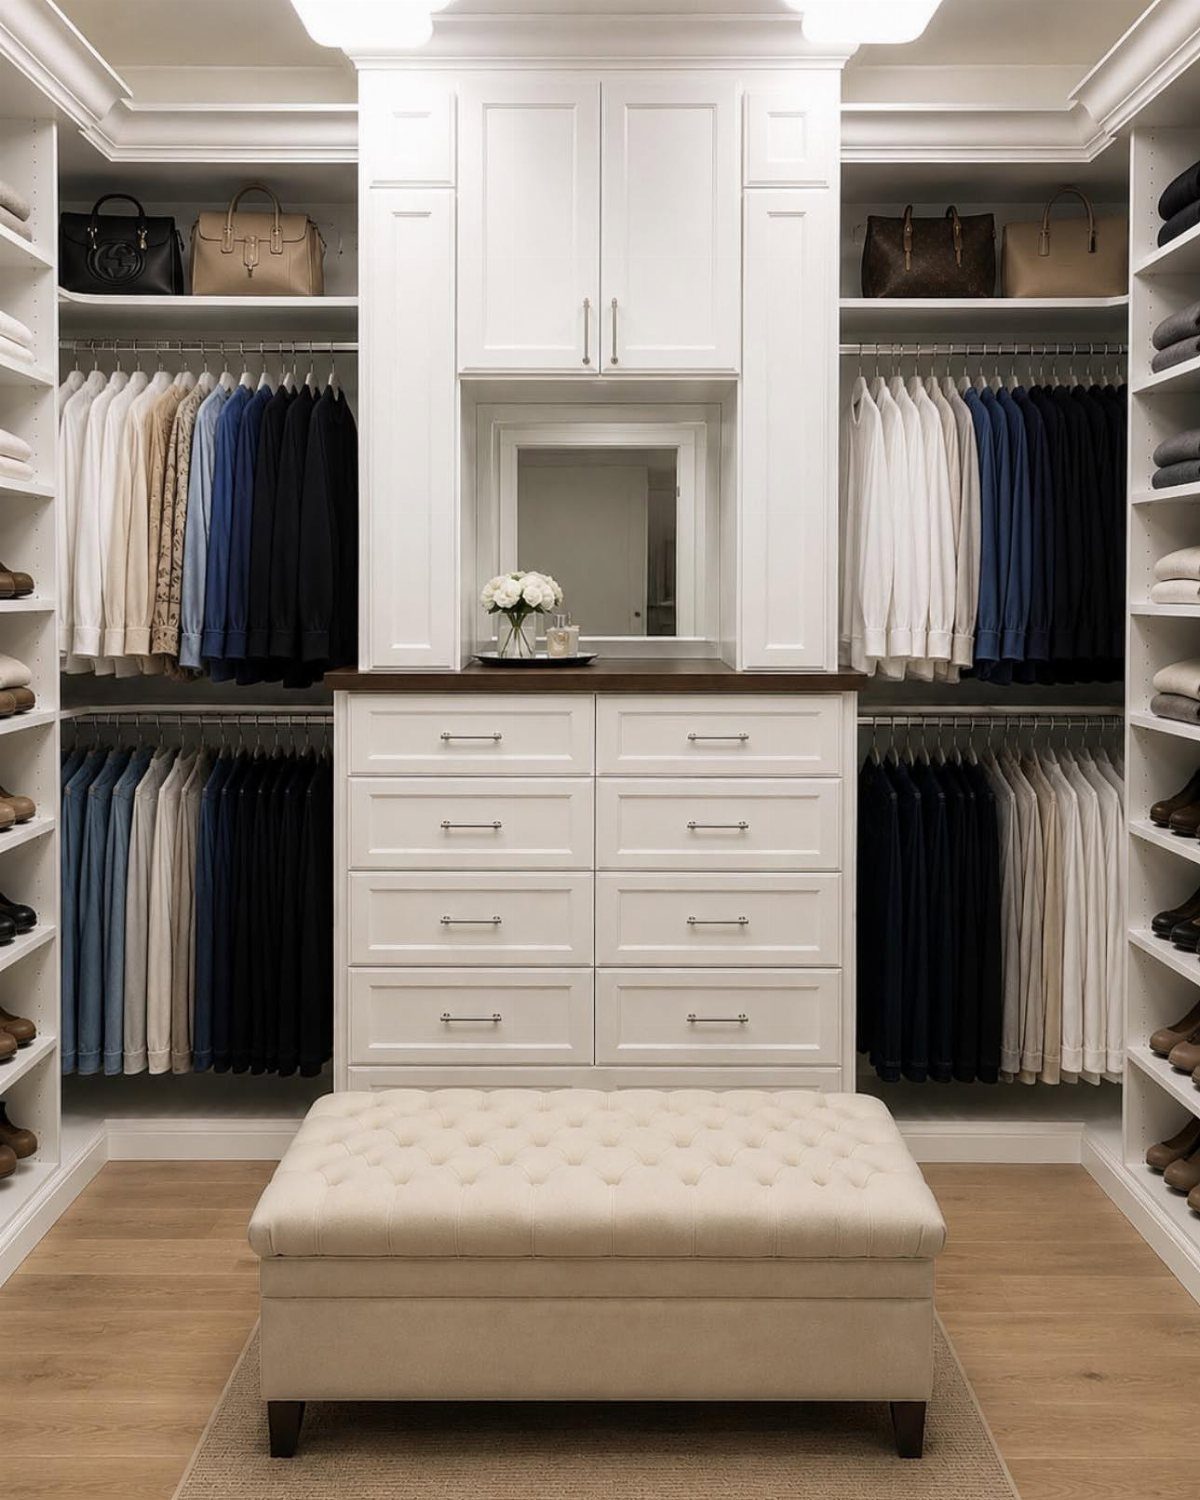
Mirror the room down the middle: matching rods on each side, with a dresser and mirror anchoring the center. Each person gets an equal run of hanging space, which ends arguments about who has more.
Measure the full wall and mark the exact midpoint first, then split the space evenly, and only then start shopping for rods and shelves.
An ottoman at the foot of the dresser gives you a place to sit while dressing. White keeps both sides neutral, so a change in either wardrobe won’t throw off the balance.
9. Glass-Front Display Cabinets
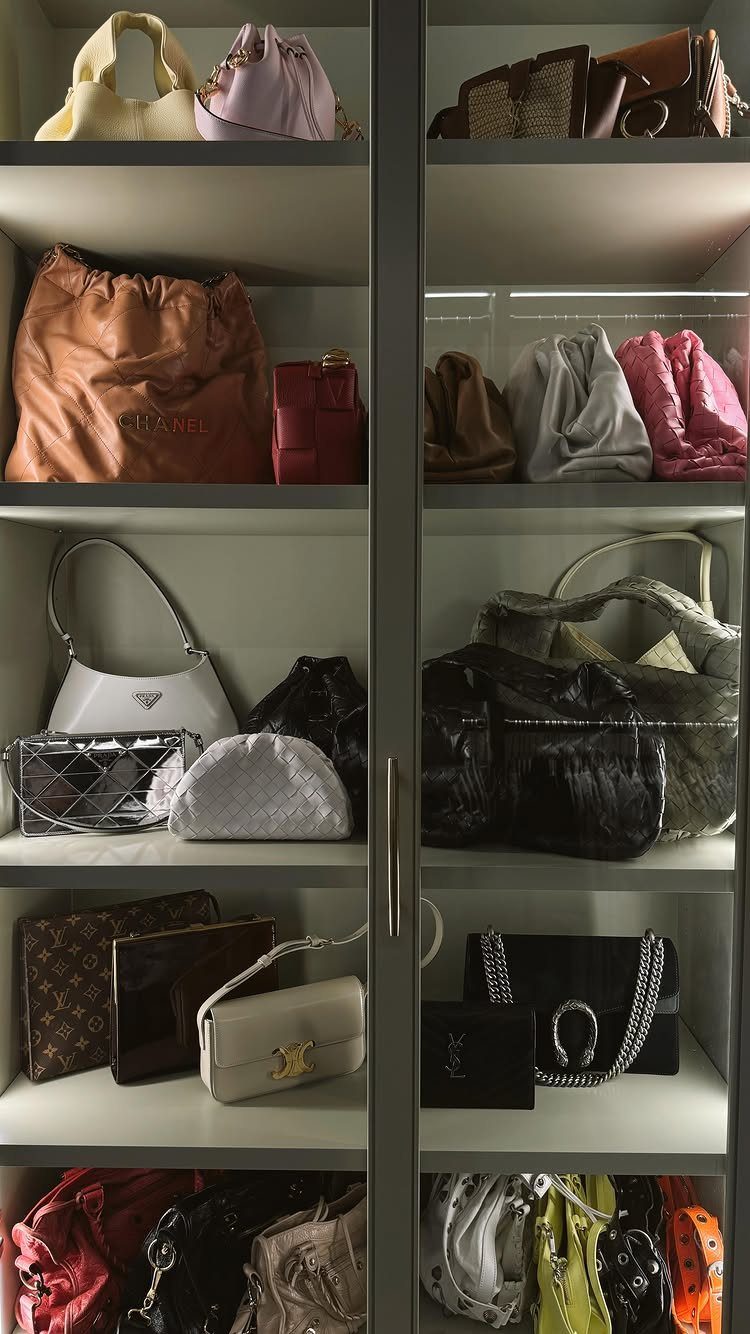
Glass doors over built-in shelves turn handbags into a display while keeping dust off them. Grey shelving behind the glass gives bags a calm backdrop, so the leather colors stand out.
Give each bag its own space instead of stacking, since crowding defeats the point of seeing them. Save the glass for the pieces you most want to show, and keep everyday bags on open shelves where they’re quicker to grab.
The maker of this one said built-in lighting was among the details they love most in their closet, and I’d agree it earns its place.
Avoiding Common Mistakes
One person ends up with jammed rods while the other has shelves that sit half empty.
Measure what each of you actually owns before you draw anything. Count the hanging pieces, the folded stacks, and the pairs of shoes, then give each person space in proportion to that inventory.
Fair means both of you can find and put away everything easily. If one wardrobe is mostly dresses and long coats and the other is mostly folded knits and tees, the layouts should look different.
Leave a little room to adjust as your clothes change. Adjustable rods and shelves make that easy.
Planning Around Routines
Think about who gets up first. If one of you leaves for a 5:00 AM run or an early commute while the other sleeps, put that person’s zone nearest the closet door.
They can grab clothes and leave without walking deep into the room and waking their partner. The later riser takes the back of the space, where there is more time to browse.
If one of you works from home and the other commutes, the same logic applies. Put the daily essentials of whoever moves through the closet most often within the first few steps of the entrance.
Maintaining Organization
Give each person a clearly marked zone, and the closet stays tidy because nothing wanders into the other side.
Give each category its own zone, and dress shirts and suits won’t get crushed by long coats, while handbags stay off the floor and out from under the gym gear.
Inside your zone, organize however your brain works: color, occasion, or season. Your partner doesn’t have to follow your system.
Keep the 2 sides from looking like separate rooms. Use the same hangers, bins, and baskets on both sides so personal style shows up in what you own and not in mismatched containers.
A small catch-all spot for stray items, like a tray or basket near the door, keeps clutter from spreading into either zone.
Frequently Asked Questions
What is the size of a standard closet?
A typical reach-in closet runs about 5–8 feet wide.
Walk-in sizes vary more, so measure your own space before you buy anything. For a walk-in shared by two people, plan on at least 36 inches of clear walkway so you can pass each other or dress at the same time.
How to organize your master bedroom closet?
Split the closet into a marked zone for each person, then sort each zone by how often you reach for things. Everyday pieces go within easy reach, and off-season items go on the high shelves.
Measure what each of you owns first, so the space is divided by actual inventory instead of an even split that leaves one side jammed and the other half empty.
Is 6×6 big enough for a walk-in closet?
A 6×6 walk-in can work, but it gets cramped when two people share it.
The usual target is a 36-inch walkway, and a 6-foot span leaves little once rods and shelves take their depth, which is often around 24 inches for cabinets.
Double hanging rods and floor-to-ceiling shelves help you get the most from that footprint.